Floral Arranging 101
(Photo: Kimberly Wang)
As someone who loves fresh flowers but isn’t too keen on shelling out $100 on an arrangement weekly, I was eager to learn how to create my own. It started by pretty much picking up my own flowers from the floral district in New York City or at my local bodega, and playing around until I found something that works for me.
I then took a course at this wonderful little plant shop in the Lower East Side called The Sill that helped solidify some of the lessons I had already learned, but also allowed me to pick up a few additional tricks.
If you have never done any kind of floral design in your life, I’ve created a basic tutorial on how to create your own small to medium-sized table centerpiece.

(Photo: Kimberly Wang)
What you’ll need:

(Photo: Kimberly Wang)
Step one: Select your flowers
The basic composition of an centerpiece is at least one variety or more of structural greens (i.e. eucalyptus, sweet almond branches, nandina leaves, etc.), one base flower, AKA the star (i.e. hydrangeas, peonies, ranunculus, roses, etc.), one accent flower, AKA the co-star (i.e. gardenias, sweet peas, button mums, etc.), and lastly, filler flowers, AKA the supporting cast (i.e. caspia flowers, larkspur, baby’s breath, etc.). This isn’t a hard and fast rule of composition for arrangements, however. It’s just a good place to start. You can also switch this up and have two accent flowers and no base flowers, or even have an entire arrangement of filler flowers.
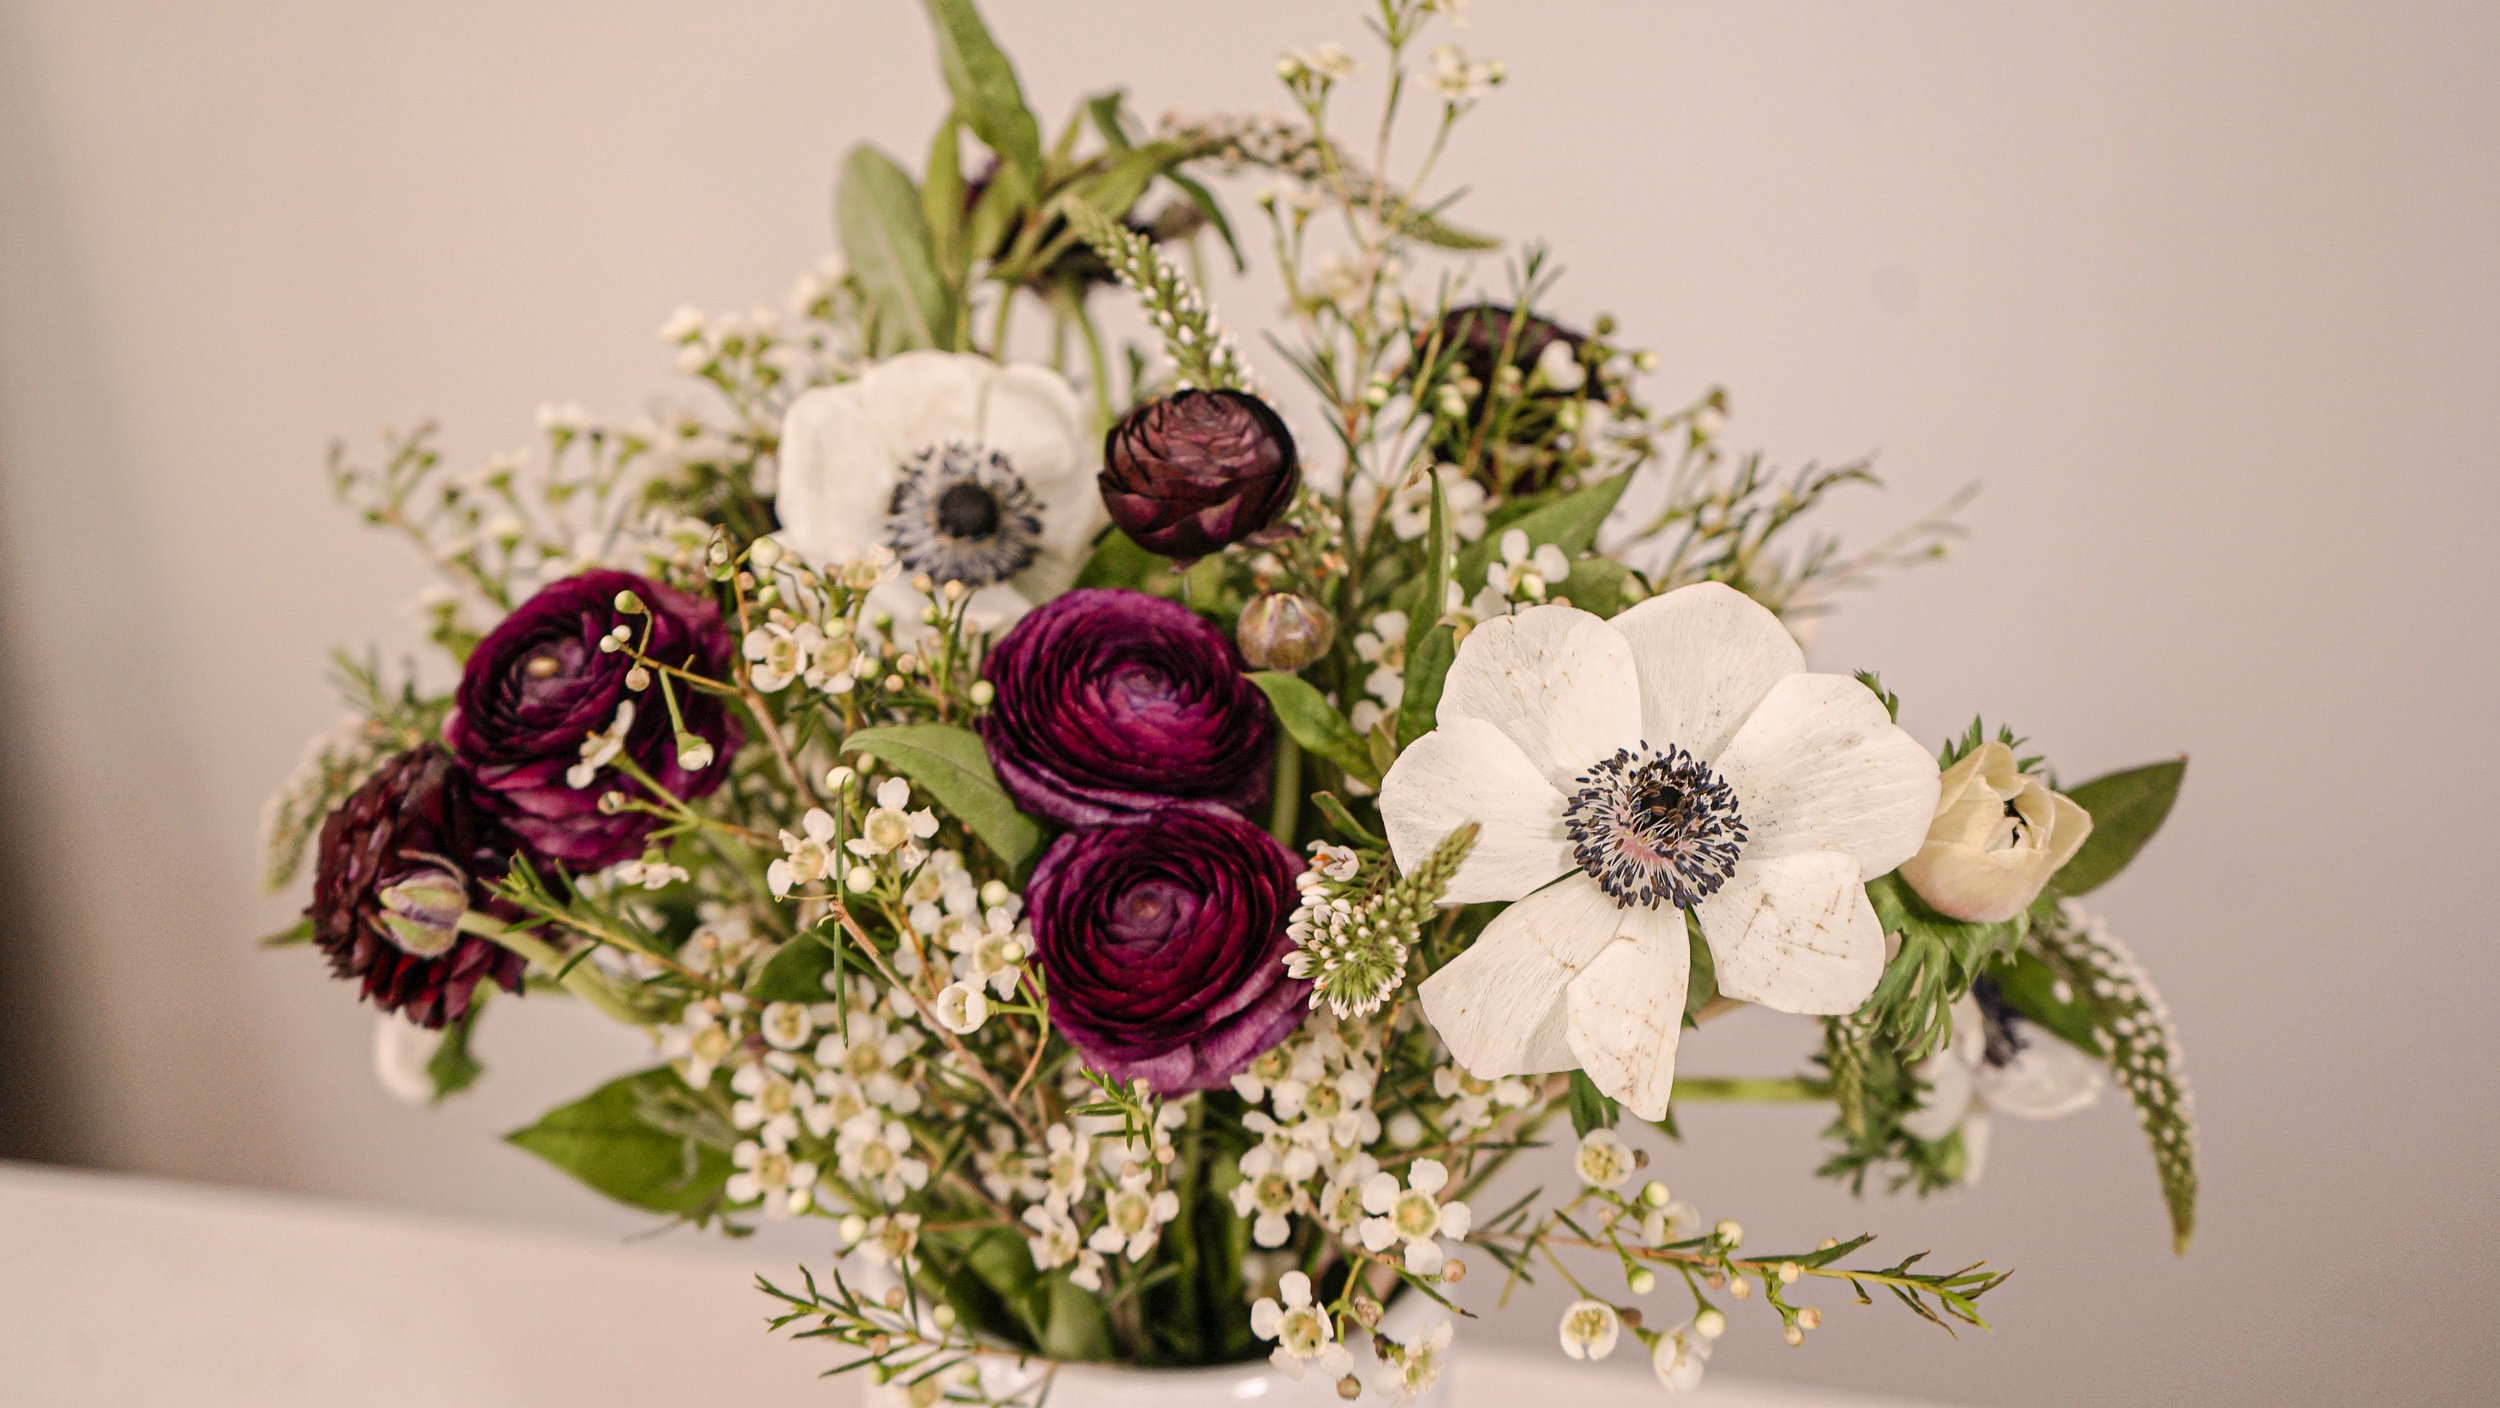
For this particular arrangement, I stopped by Dutch Flower Line on 28th Street and 7th Avenue, and picked up a bunch of deep burgundy ranunculus (the flowers that inspired my wedding hues — which you can read about here) for my base flowers, ten stems of white anemones as my accent flowers, a bouquet of white wax flowers for my structural greens, and lastly, a bunch of lovely, drooping white Lysimachia clethoroides, AKA White Gooseneck Loosestrife, for my filler flowers.
(Photo: Kimberly Wang)
Step two: Prep your flowers
Start by filling a medium sized vase up to two-thirds with lukewarm water and dissolving some flower food into it. Next, you’ll want to have a pair of clean flower shears and a large cleared workspace, like a countertop or table. Prepping flowers can get a bit messy, so make sure you’re wearing and apron or clothing that you’re not afraid to get a little dirty. Next, divide your flowers and branches by type and prep them for arranging.

(Photo: Kimberly Wang)
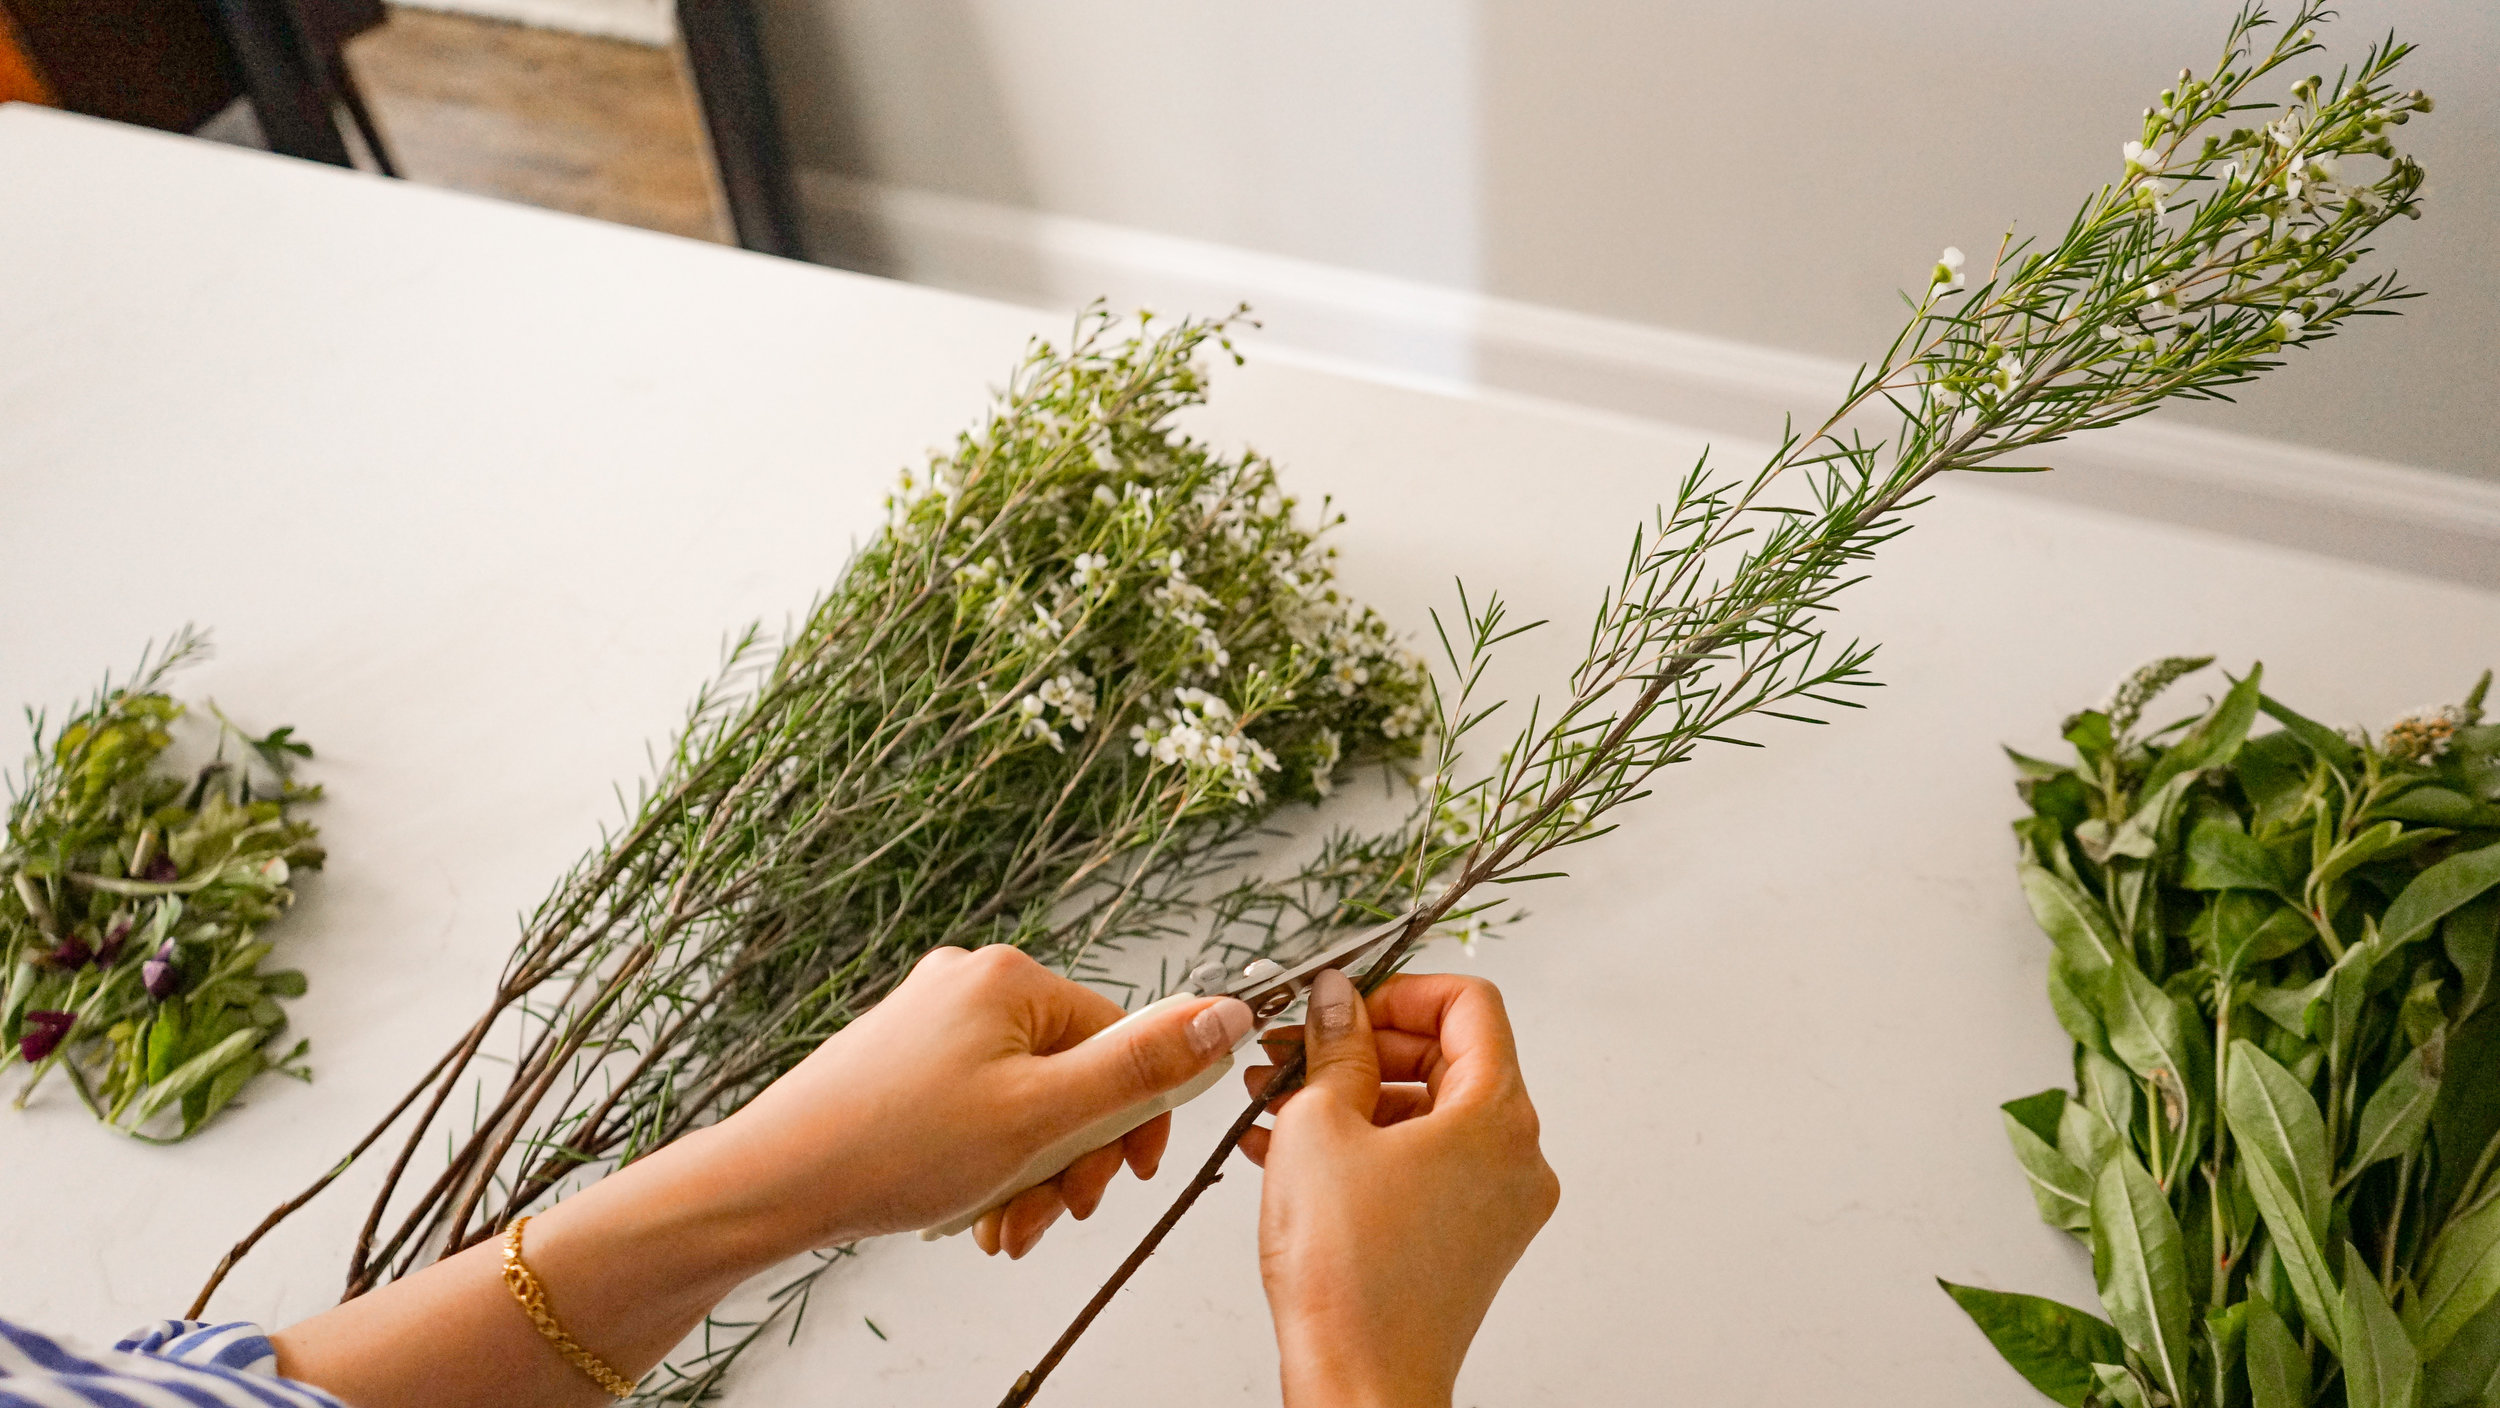
For the structural greens, using your shears, you’ll want to separate any branches that are too large into two or sometimes three parts. You’ll also want to remove all thorns and any leaves that will be below the neck of the vase. Removing leaves is pretty key for keeping your water clean, as extra leaves will trap bacteria and muck up the water quickly. You may want to also clean up these branches by removing excess or damaged leaves and stems.

(Photo: Kimberly Wang)
For these wax flowers, it has spiny, waxy leaves, and removing them is similar to the way you would strip rosemary. Pinch your fingers along the top part of the stem you want to clean off and just pull your fingers downwards. This motion will strip the branch clean.
The same rules for your structural greens apply to your filler flowers. Separate any clusters that are too large (which you can then use as two smaller, separate pieces!), and remove any excess or damaged sprays. Depending on how it looks, I may also remove all or most of the leaves on my filler flowers — and definitely anything south of the opening of the vase.

(Photo: Kimberly Wang)
For accent and base flowers, I like removing pretty much all of the leaves. When it comes to leaves in my arrangements, the rule is if the leaves don’t serve a purpose (like with spacing or aesthetics) they’re gone. This helps keeps the flowers looking pretty clean. I clean up and prep my flowers much the same way as I do for the filler flowers in that I’ll generally separate larger clumps (but I keep some if I think that the smaller bloom adds to the look) and take off anything that’s damaged or browning. Remove all thorns.

(Photo: Kimberly Wang)
Step three: Start by creating the foundation
Now, just a note, there are a number of ways to build an arrangement. You can always arrange directly in a vase with the aid of chicken wire, floral tape, or even a sponge. But in this particular instance, since this is only a small to medium-sized arrangement, I’m going to teach you how to arrange directly in hand. I find that arranging in hand gives me more control over how the final arrangement will look, and it’s a good way for beginners to learn. You want to start the arrangement by creating the architectural foundation of your bouquet.
You do this by taking two branches of your woodiest or strongest structural greens and crossing them in an X in one hand. Then, take a third branch and lay it between the other two branches so that it bisects the X. This is the base of your arrangement.
(Photo: Kimberly Wang)
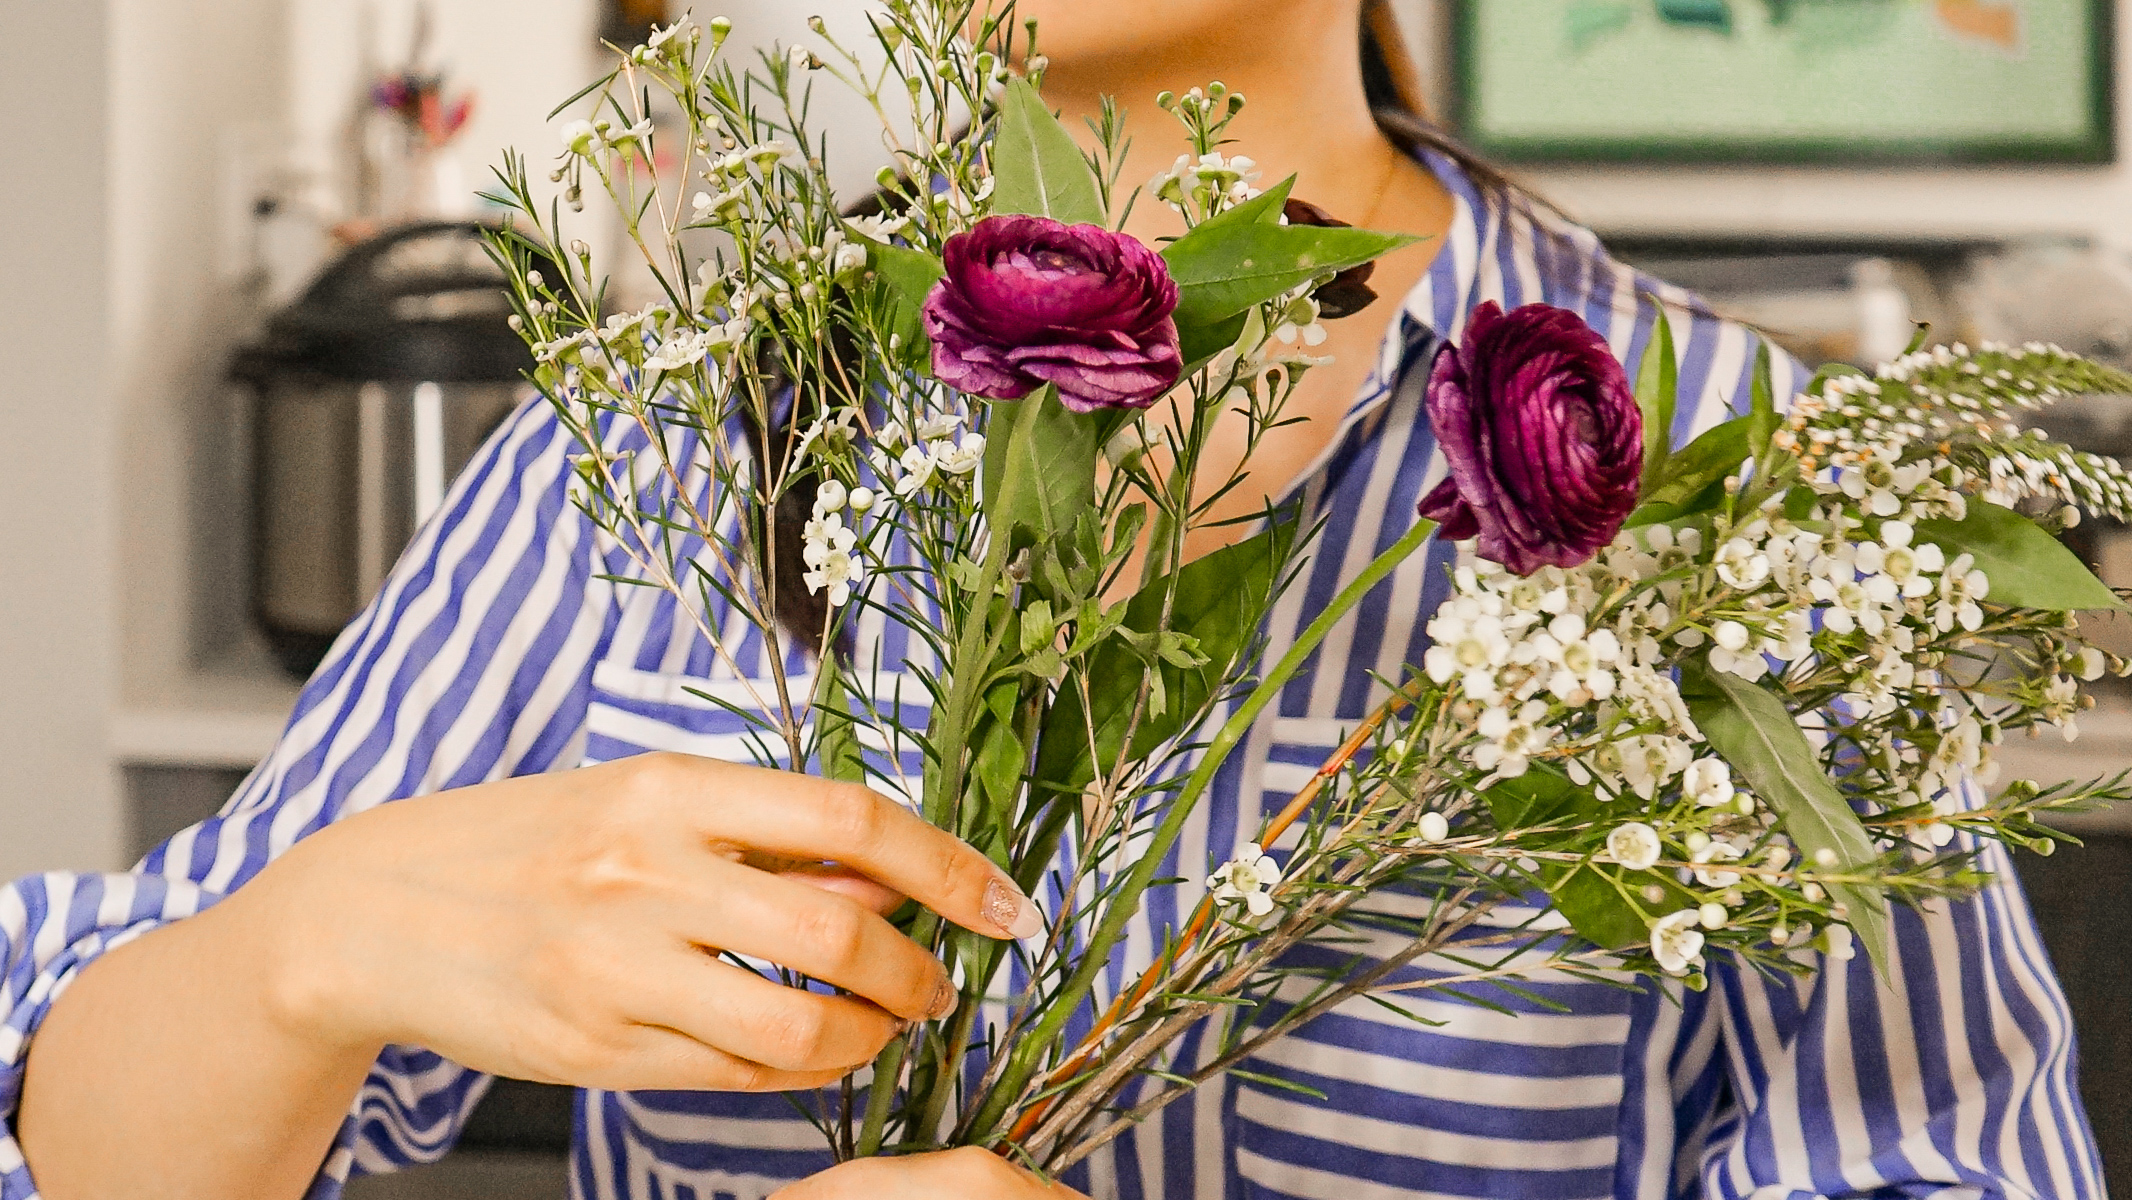
Step four: Add your base flowers
When arranging your flowers in hand, you want to constantly be turning your arranging around in your hand so you can see what it looks like from all angles — and most importantly, from the top. When you’re looking down at your bouquet, you want to imagine you are looking at a compass with all the flowers and branches radiating out from a center. Thus, you want to be make sure the center is also full.
Start by adding in your base flowers to your structure. You want to always criss-cross flowers as you arrange them, and an easy way to maintain balance when arranging in hand is if you’re adding in a flower from the West of your “compass,” you must counter it by inserting another flower from the East.
Make sure your flowers aren’t all bunched together on one side, instead spread them out, in either small clusters or two or singular blooms all around your “compass.” The base flowers are there to be the focal points of your arrangement.
I like to keep my base flowers closer to the bottom of the arrangement, but make sure you have one or two filling in the center as well.
(Photo: Kimberly Wang)
Step five: Add your accent flowers
Next up are the co-stars. I added the anemones throughout the arrangement making sure I covered all sides and the center. For flowers that have interesting lateral growths, as some of the anemones did, I like to balance them out by criss-crossing them. I don’t like to hide them in the center, since I feel like the way they stretch actually gives the arrangement a feeling of wild-growth and movement.
Play with and vary the heights of your flowers. You want the center of your arrangement to be the tallest point of the arrangement, and the flowers on the sides to get shorter and shorter as you get to the base of your arrangement.
Don’t neglect the center of your arrangement, as the last thing you want is to finish and arrangement, and realizing there’s a big hole when you look from the top down.
Another important not when adding in accent flowers is you want to pay attention to spacing in your arrangement so that every flower is expressing itself. You don’t want to cram a ton of flowers together, as it’ll suffocate the design.
While adding in accent flowers, don’t forget to keep turning the arrangement in your hand so you can view it from all angles.

(Photo: Kimberly Wang)
Step six: Add in your filler flowers
Finally, add in your filler flowers into any spaces that feel empty for you using the same principles as above. Don’t crowd your flowers, don’t neglect the center, keep the top the tallest and the sides shorter, and keep turning and adding flowers so you can view the arrangement from all angles.
Filler flowers are intended to fill in any big gaps, and are not the focal point of your arrangement. Thus, I don’t like to cluster them together. Instead, I like to really spread them out and carefully choose where they go in. In my case, I wanted to showcase the beautiful gooseneck of the Lysimachia, so I let them really hang off the sides and interspersed them between the ranunculus and anemones.

(Photo: Kimberly Wang)
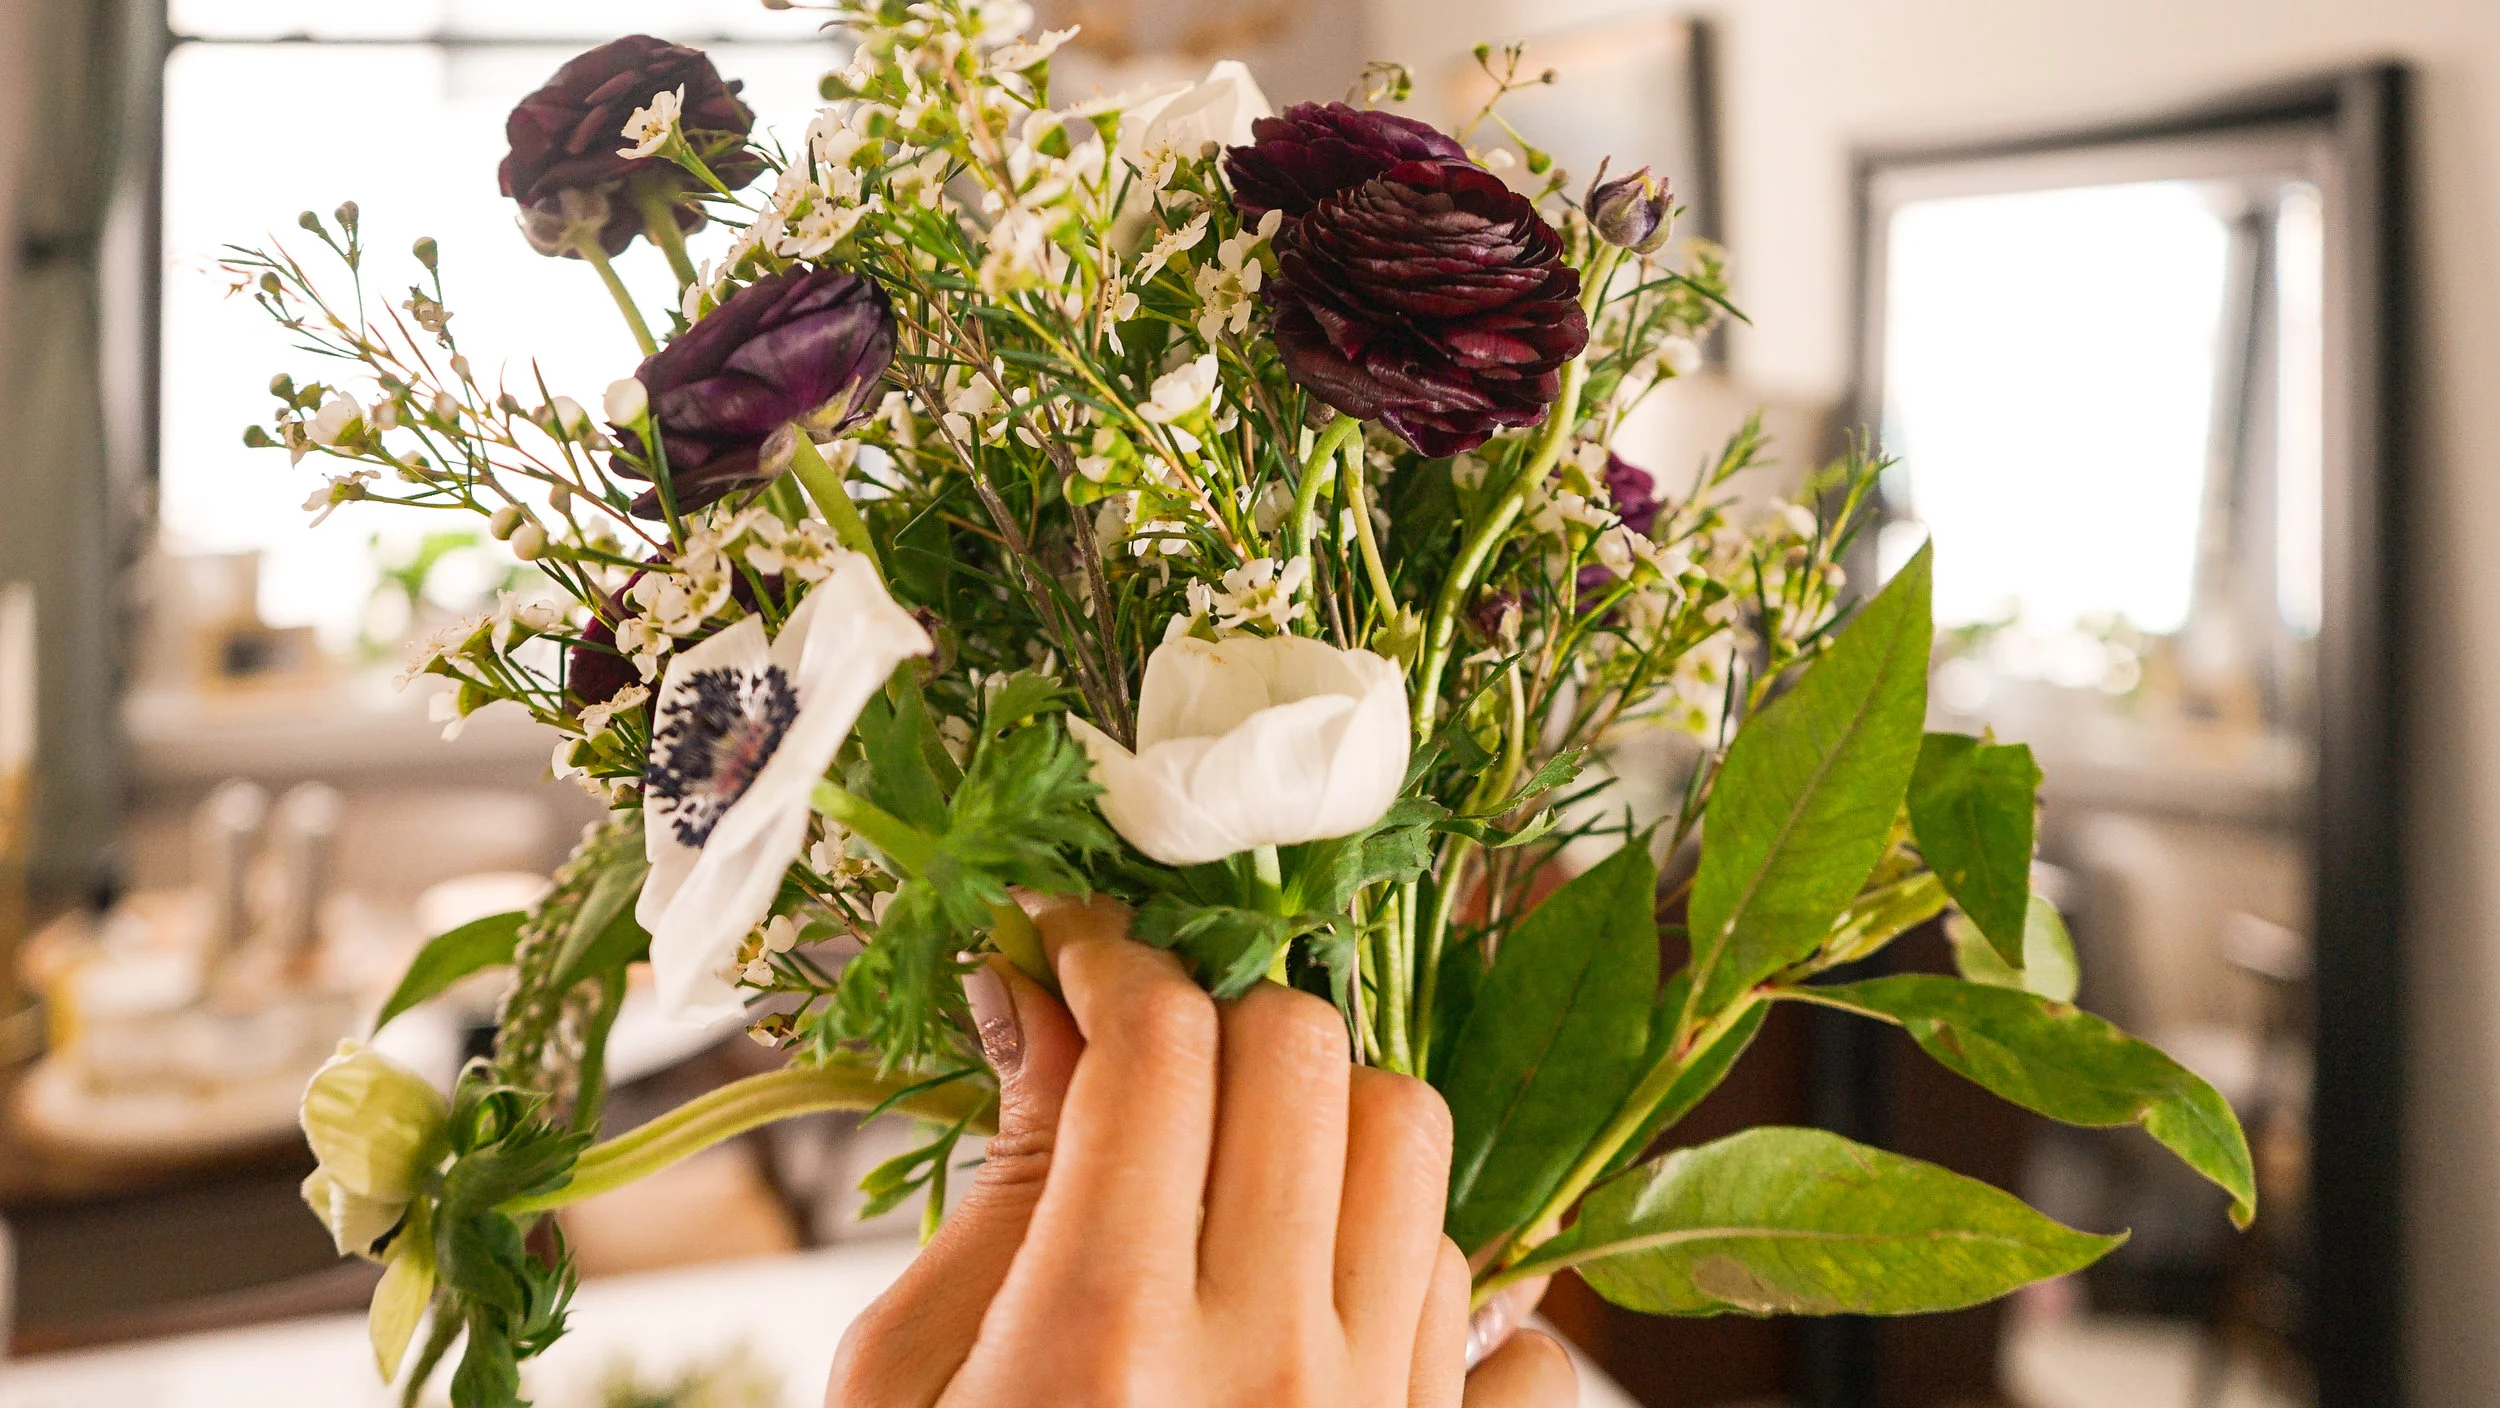
Step seven: When you’re happy with the look, bind your bouquet
Before I bind, I usually keep tweaking and adjusting the arrangement, turning it over and over in hand so I can adjust the height and directions of the blooms from all angles. When I’m satisfied with the overall look, I’ll tie my arrangement so that it keeps the shape and design I want. Rubber bands are fine, but I find twine to actually be an easier alternative for binding.

(Photo: Kimberly Wang)
Step eight: Measure and trim your flowers
I don’t like to trim until I finish binding, as this allows me to know exactly where I want to cut each stem. The best way to measure is to hold your bouquet up to your vase and seeing where you would like the flowers to sit. For a vase of the shape I used, I like the base of my arrangement to sit just an inch or so above the opening.
Next, take your gardening shears and trim the base at a 45-degree angle. I’ve explained why before in my Upgrade Your Basic Bodega Rose piece, but I’ll reiterate. Cutting your flowers in this way allows the stem to have the greatest surface to drink up water. When you’re done trimming, set your flower into the vase and do your final adjustments, as the blooms might have shifted a bit during the trimming process.
Et voilà! You’ve just created your own floral centerpiece.

(Photo: Kimberly Wang)
Step nine: Maintain your blossoms
Follow these steps to prolong the freshness of your blooms.
Change the water and add in new flower food regularly, like every day if possible. Cloudy water will kill your flowers fast.
Keep your flowers away from fruit, as ethylene gas can make your flowers wilt quickly.
Also, don’t keep your flowers on windowsills as the sun can cause the flowers to overheat. Flowers like it cool. But don’t keep them over a draft, as this will dehydrate them.
Remove any dead leaves or blooms immediately. Basically, anything that introduces bacteria to your stems is bad news. You might even want to replace the water, clean the vase, and recut your stems from time to time when you see cloudy water or dead leaves floating in the water.

How I like to keep the collateral damage blooms that are too pretty to discard. (Photo: Kimberly Wang)