9 At-Home Exercises That Are Long-Term Solutions for Back Pain

(Photo: Helen Thomas)
Last time we discussed back pain, we talked about exercises you could do when back pain sets in while you’re on the go. While these exercises are great to help you out when you’re in a pinch, the best way to treat back pain longterm is by doing strengthening exercises regularly. “In the past, we used to think that if you have low back pain, [the best treatment] was to stretch and lay off of it, do some bed rest and you’ll feel better,” says Dr. Natalia Rodriguez, PT, DPT of Integrative Spine and Sports in New York City. “But now with research, we know that what really helps us feel better in the long term with low back pain is promoting strength of the muscles that surround the back.”
For the average, healthy adult, Dr. Rodriguez recommends doing these exercises a minimum of three times a week and ideally up to five times per week to build strength. For these moves, you may need a yoga mat and resistance bands. Also, for some of the advanced moves, you’ll need a foam roller.
Plank
The classic plank helps you develop endurance of core muscles, which include all muscle between the shoulders, the hips, the abdominals, and the butt. There’s a common misconception that the abs are the only part of the core, but actually several muscle groups have to work together in order to create a strong core.

(Photo: Kimberly Wang)
To do a proper plank, you want to engage lower abdominals by doing a pelvic tilt. (Remember the pelvic tilt? Check out the back exercises on-the-go post for a refresher!) Keep hips and shoulders aligned without rounding or arching the back.
Elbows should be right under shoulders, and spread shoulder-width apart. Start on elbows instead of hands since hands puts stress on shoulders and we want more of the stress to be on the trunk to build strength. Your feet are called your base of support, and keeping them wider apart is easier, but if you want a challenge, place them closer together. Toes should be curled under your soles and be sure to keep your legs straight. If this stance is too challenging, keeping your knees bent on the floor is an easier alternative.
Hold the pose for 10 seconds to a minute, depending on your strength. Repeat three times.
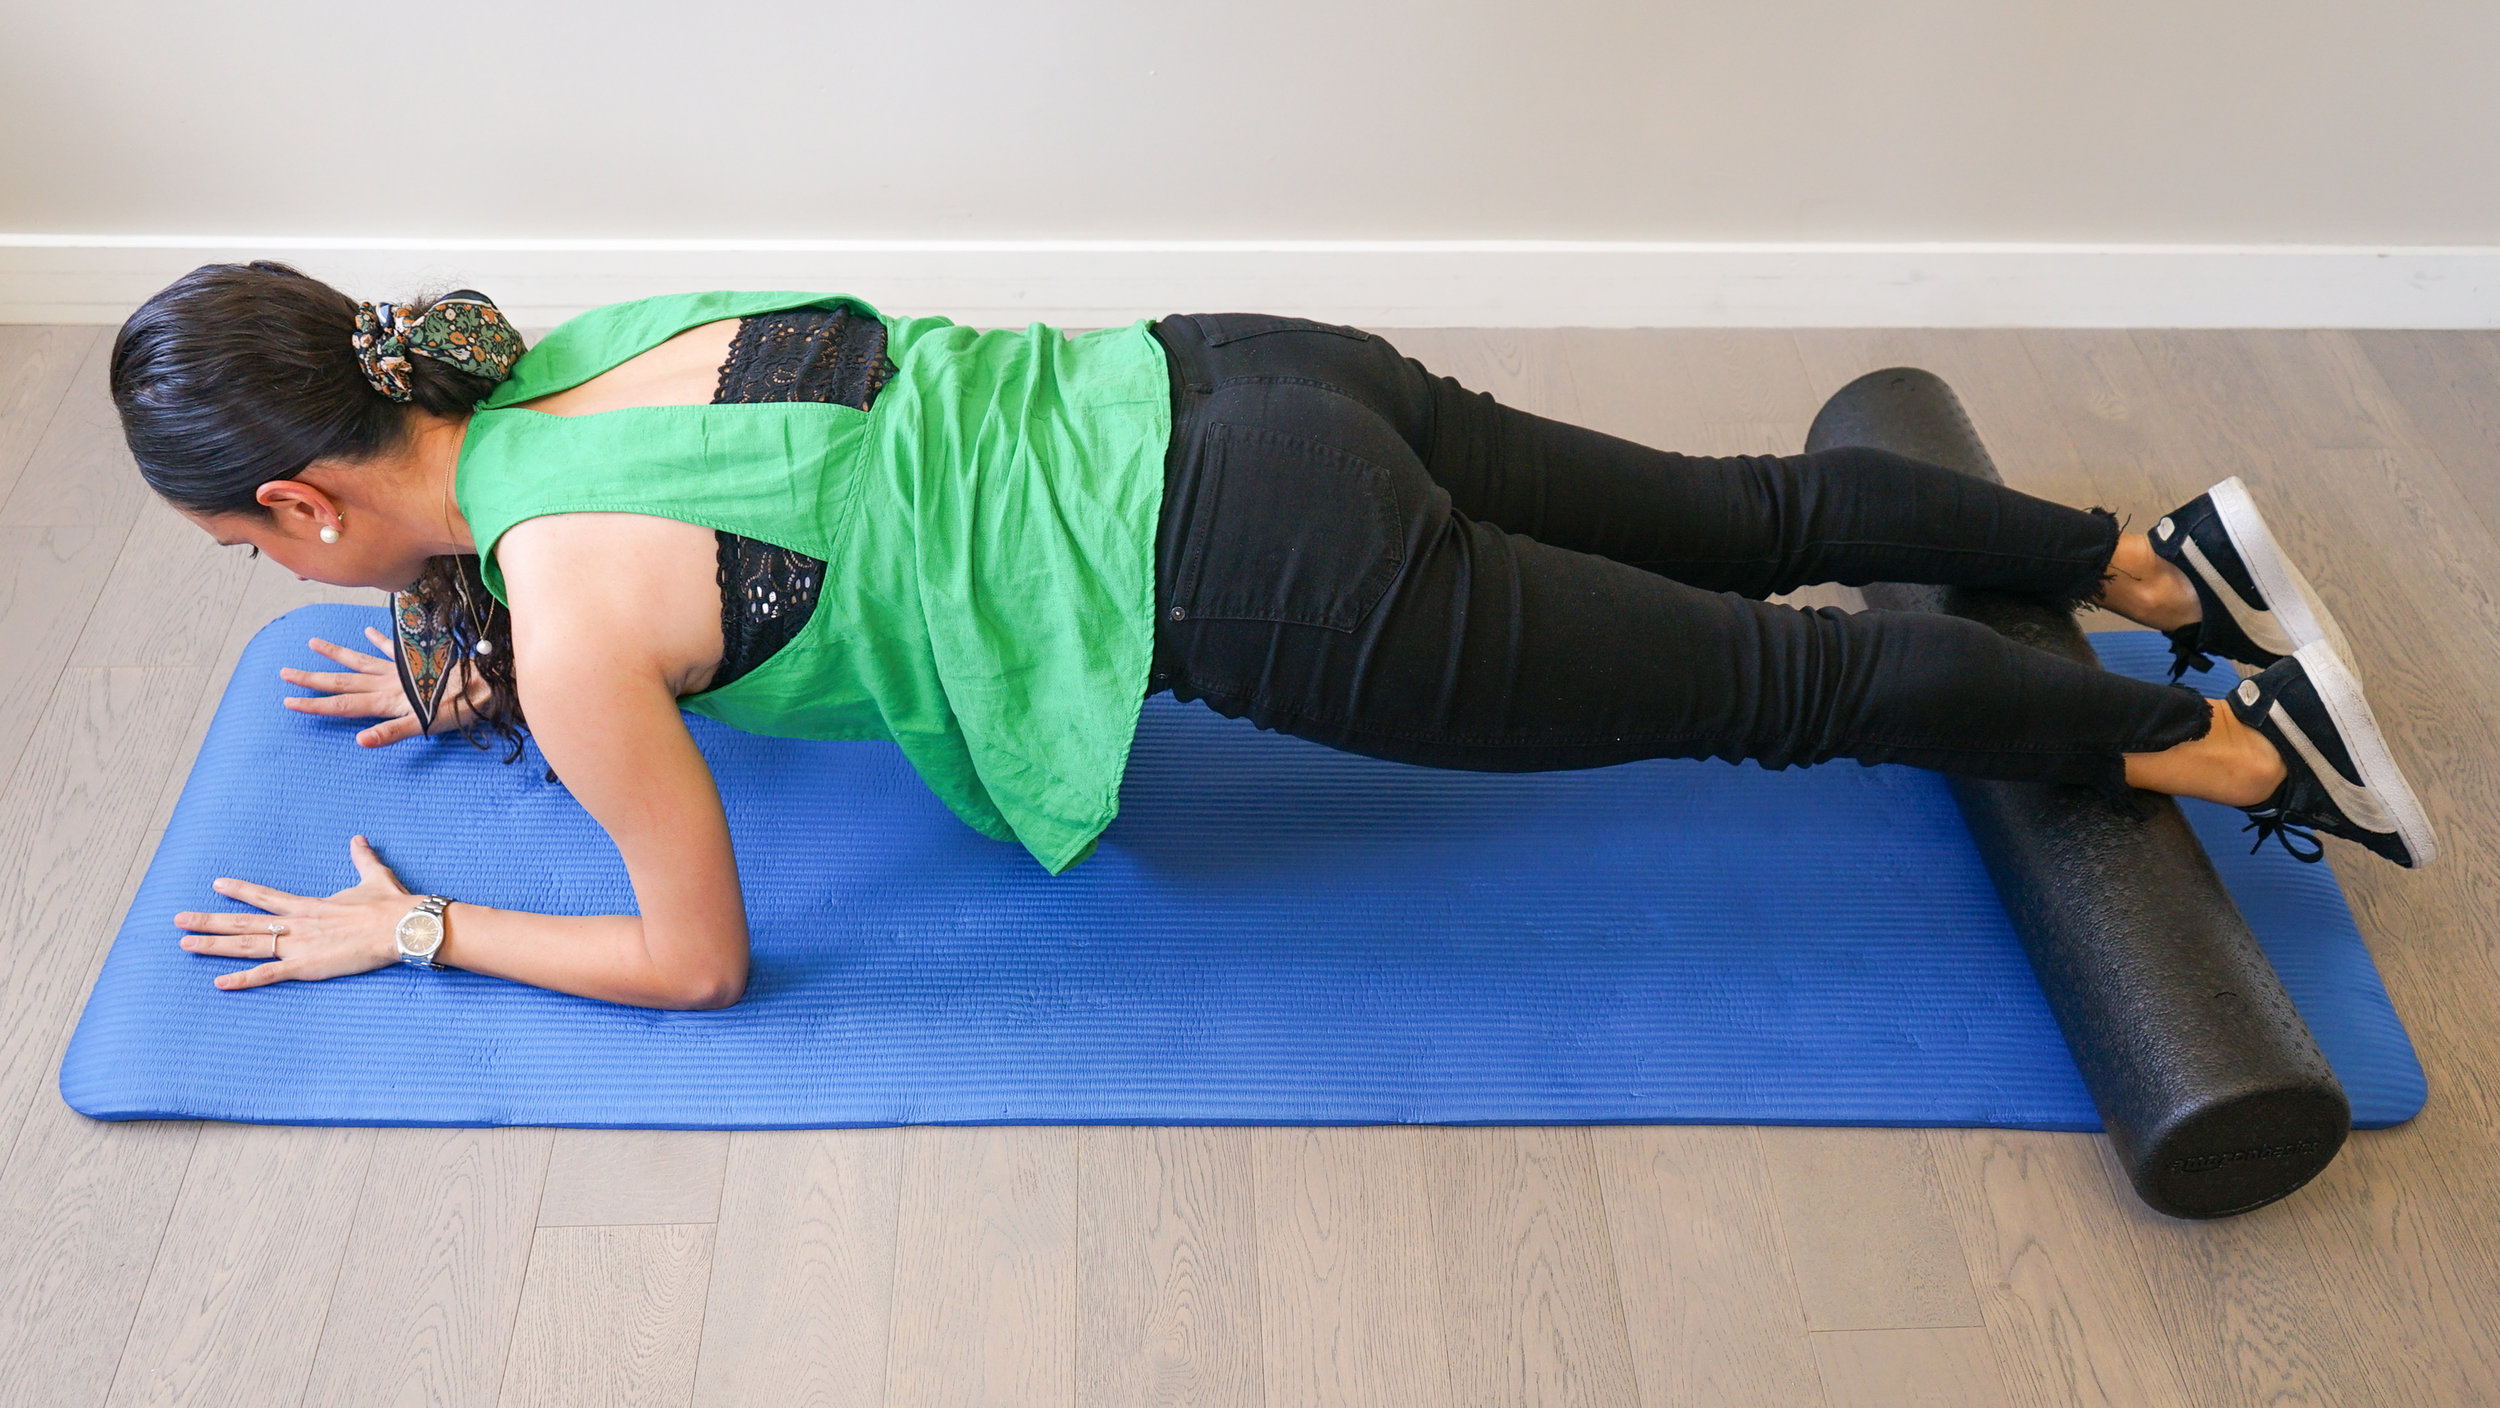
Advanced plank
While the plank is an isometric exercise, which means holding one position without moving, the advanced plank is a dynamic exercise, which means you’re making a controlled movement.
(Photo: Kimberly Wang)
Start by placing your shins on a foam roller while maintaining the posture of a regular plank, which is elbows aligned under shoulders, back straight and flat, and spine in a neutral position.
Start this exercise in 10 second spurts and working up to a minute. Do three to five reps depending on your own strength.

(Photo: Kimberly Wang)
Then, slowly bend your knees towards your chest, rolling the foam roller up the mat. The key here is to maintain a neutral spine. Do not bend or arch your back as you bring foam roller in.
Start at 10 second spurts up to a minute. Do three to five reps depending on your own strength.
Side plank
The difference between a side plank and a regular plank is that the side plank is working your obliques and side muscles, which can help strengthen your trunk.

(Photo: Kimberly Wang)
To do a proper side plank, position your elbow right under the shoulder. Elbow, shoulder, hip, and ankle should all be in a straight link. Slightly tuck your pelvis under towards your belly button to engage lower abs and flutes. Keep your feet and legs straight. The balance of a side plank falls on the elbows and the ankles.
Start at 10 seconds for this move and gradually increase to a minute. Repeat three to five times.
Advanced side plank, AKA “The Star”
If you want to take your exercise one step further, try doing the advanced side plank, which Dr. Rodriguez has nicknamed “The Star.”

Start from a regular side plank position. Then, lift your top leg up into the air so that all of your weight is balanced on one leg and one elbow. The Star could be a dynamic or an isometric exercise, with isometric being the easier option, of course.
As before, start at 10 seconds for this move and gradually increase to a minute. Do this three to five times.
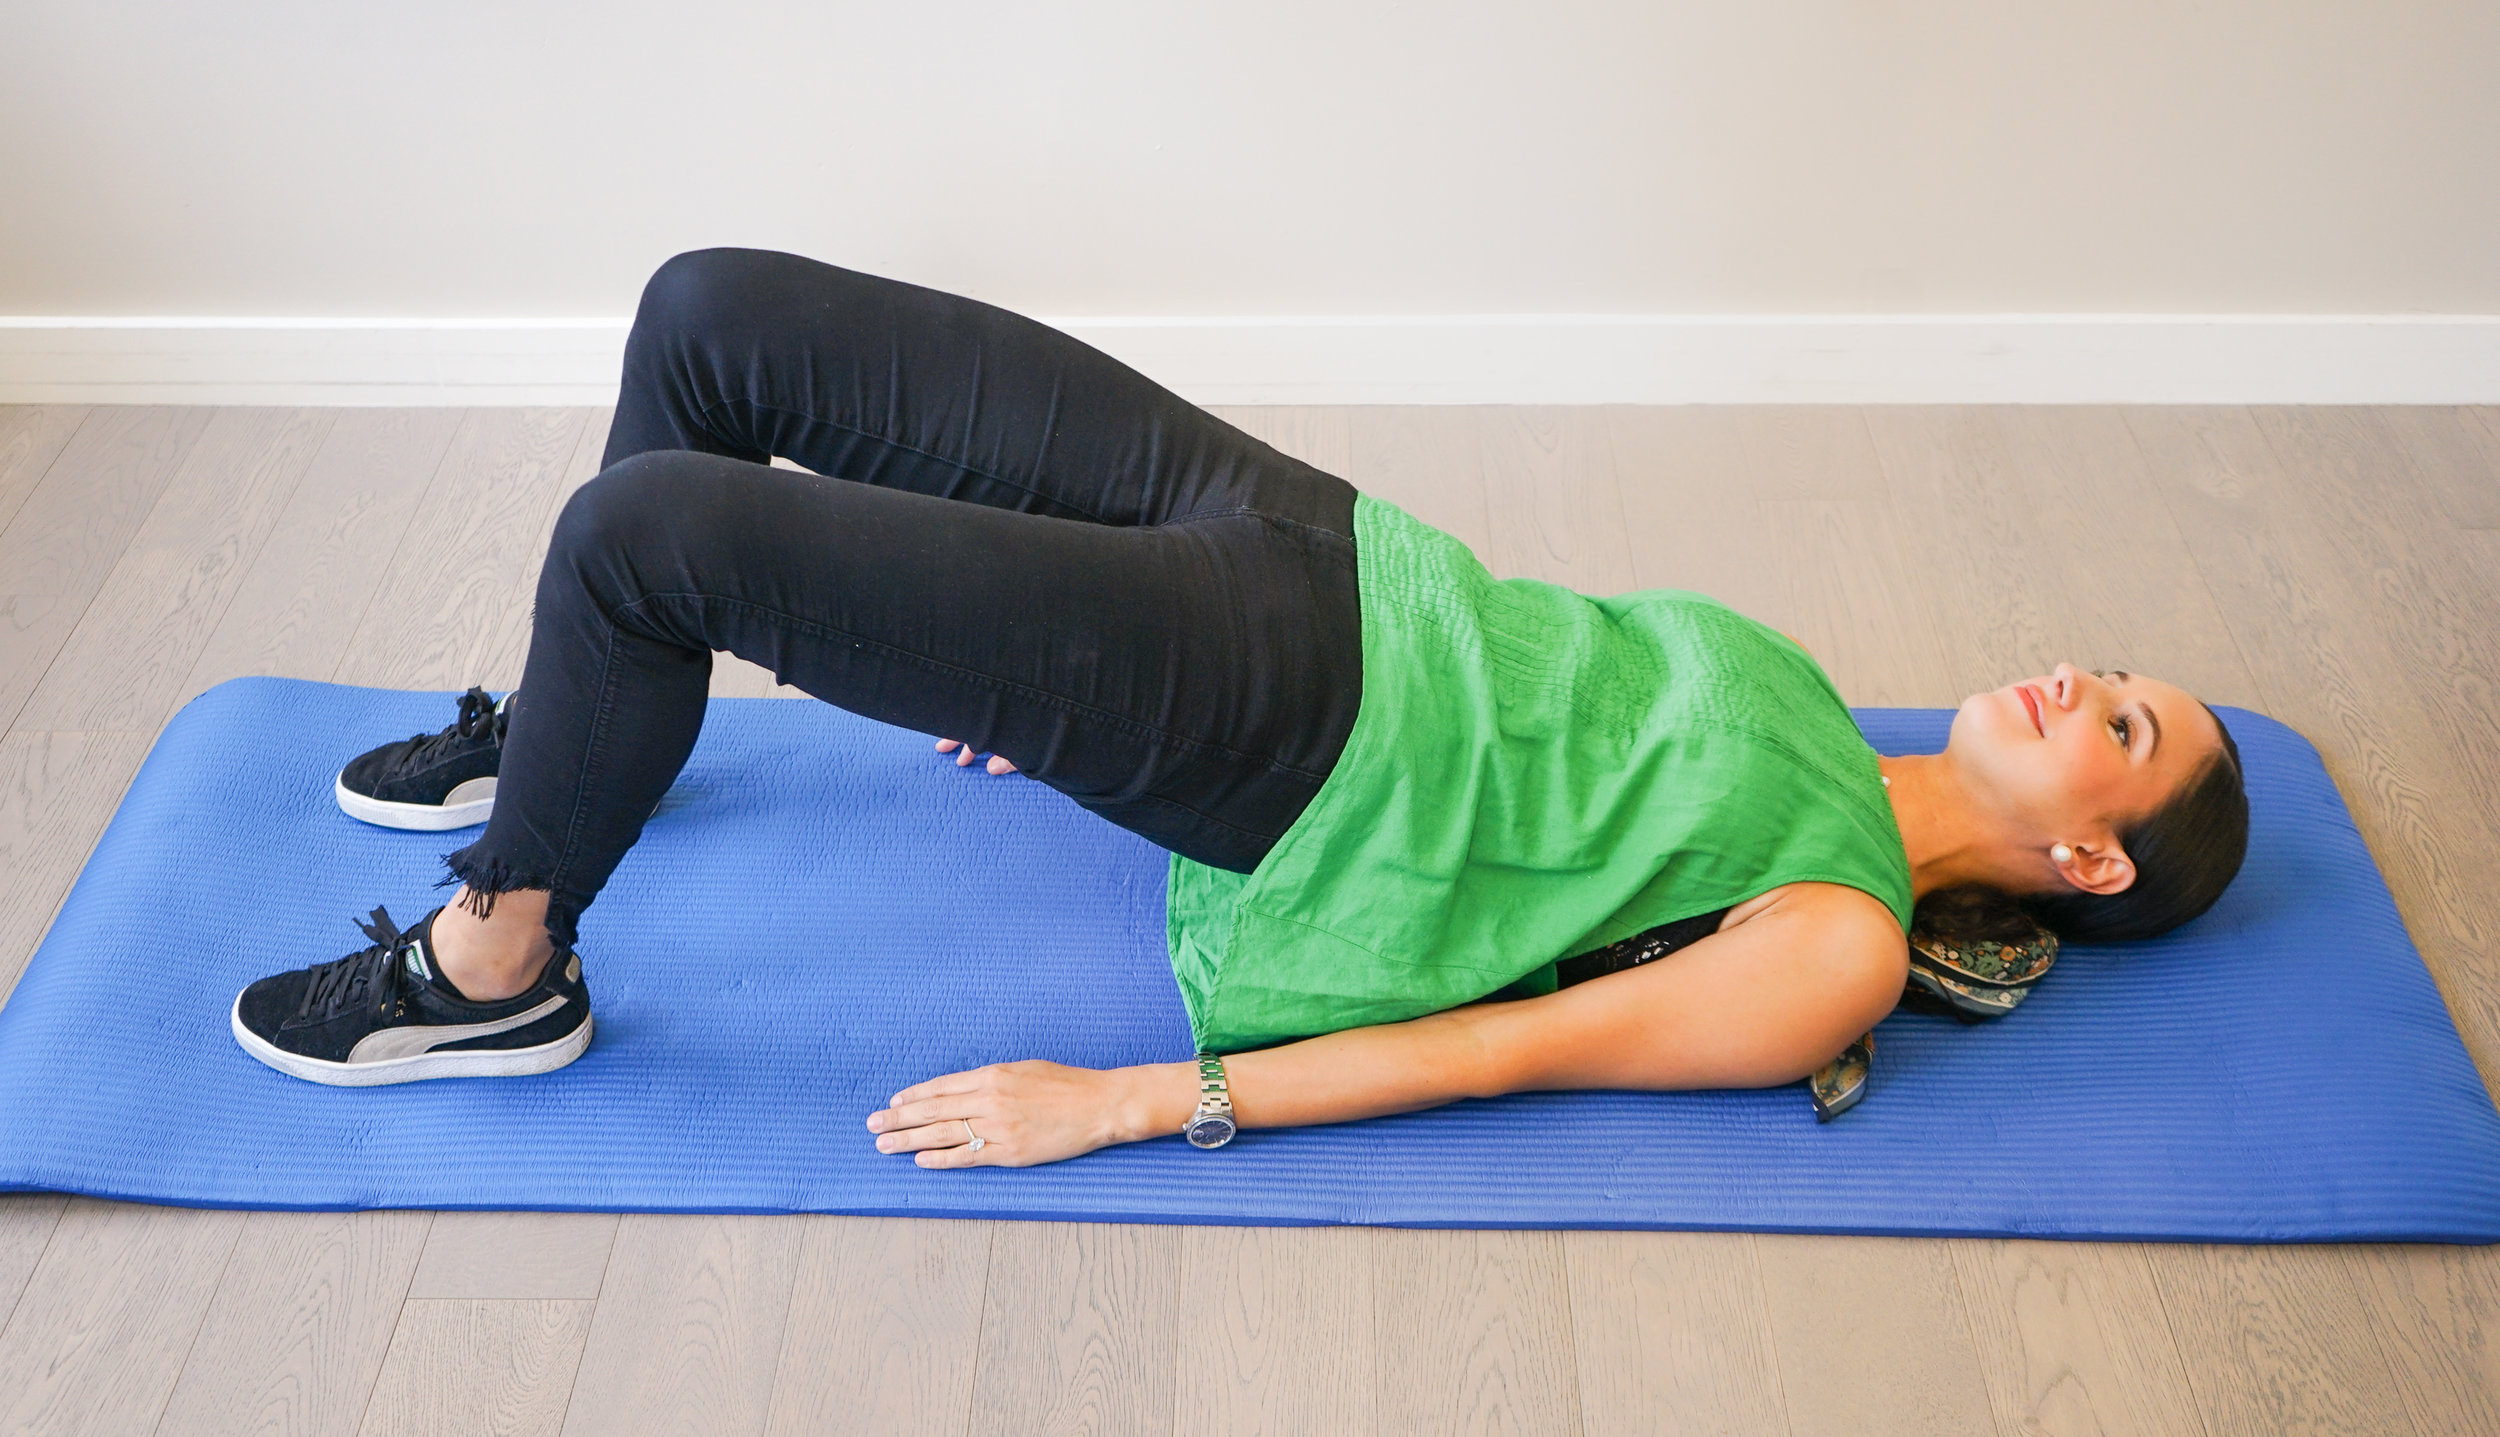
Bridge
This classic move helps to strengthen your glute and core muscles. Generally, the bridge is a dynamic exercise. However, if you’re very weak, you can also simply hold it like an isometric move.
(Photo: Kimberly Wang)
For placement, have your feet one and half foot length away from your butt. You shouldn’t be able to touch your heels with your hands. If your knees hurt during this move, it’s possible that you’re resting your feet too close to your butt.
Keep your feet hip-width apart, and push up primarily through the heels to engage the glutes. Tuck your pelvis at the start of the bridge to engage lower abdominal muscles. Lift as far up as you can without arching the back or losing the tilt of the pelvis.
Hands are flat and resting on the ground, and feel free to press the ground when you’re pushing up if necessary, but for a challenge, keep your hands relaxed.
Do reps of 10 to 15 with a two second hold at top, and repeat three times. If you’re exhausted, take a longer rest, otherwise, keep your rests a brief 10 seconds between sets.
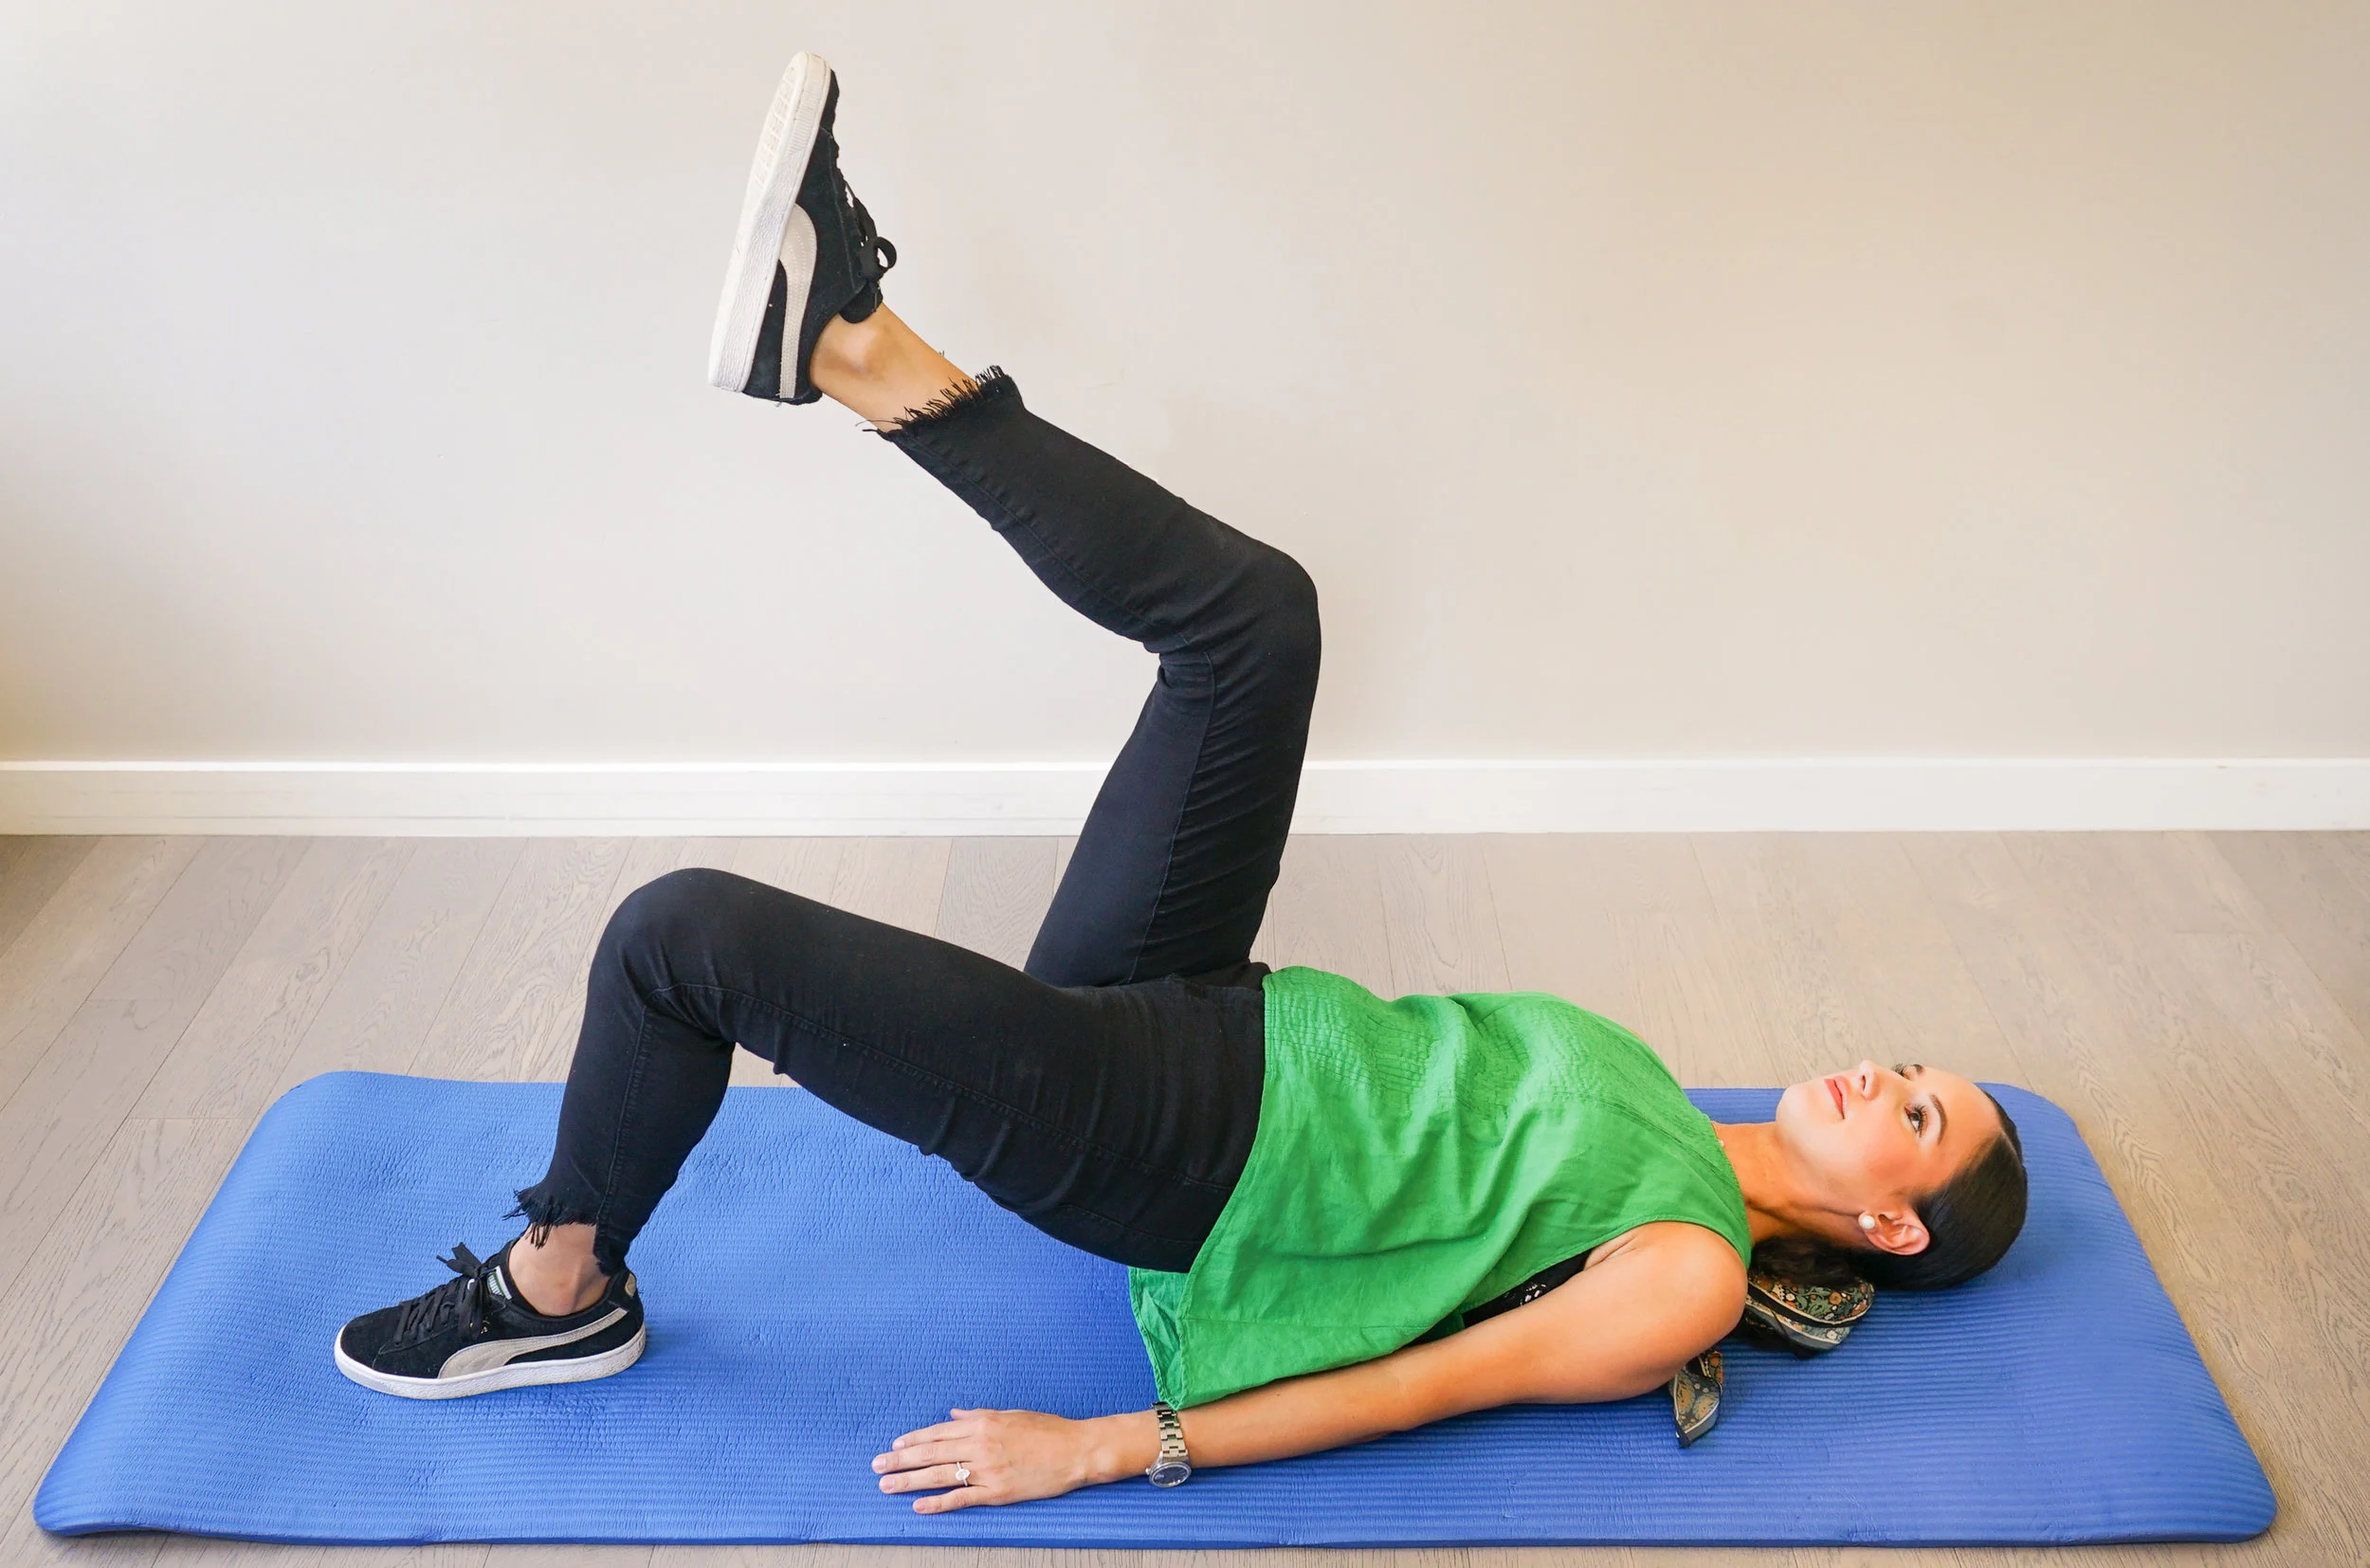
Advanced single leg bridge
This move makes it harder for one glute as it’s biasing one side at a time. Be aware that you probably won’t lift your bridge as high, as this move is more difficult. Be careful not to arch the back, and to push through your heels, and maintaining a forward pelvis tuck.
(Photo: Kimberly Wang)
From a normal bridge position, slowly lift one leg off floor while keeping the two sides of your pelvis even. Imagine you have a level resting between your pelvis points as you lift up. The bubble shouldn’t shift left or right even as you move your leg into the air. Make sure you are pushing through heels as you lift.
Do reps of 10 to 15 with a two second hold at top, and repeat three times. If you’re exhausted, take a longer rest, otherwise, keep your rests a brief 10 seconds between sets.
Foam roller bridge
This of this move as an at-home hamstring curl machine, and it creates stronger glutes, which helps lift your butt. Stronger glutes will allow your lower back to do less work when walking, carrying, and lifting. As your lower back muscles are smaller than your glutes, you should try to engage your glutes whenever possible.

Start by placing your feet on the foam roller and lift into bridge with all the same components. Roll foam roller away from but three to five inches depending on strength and roll back to starting point. The pelvis may drop a little as your roll out.
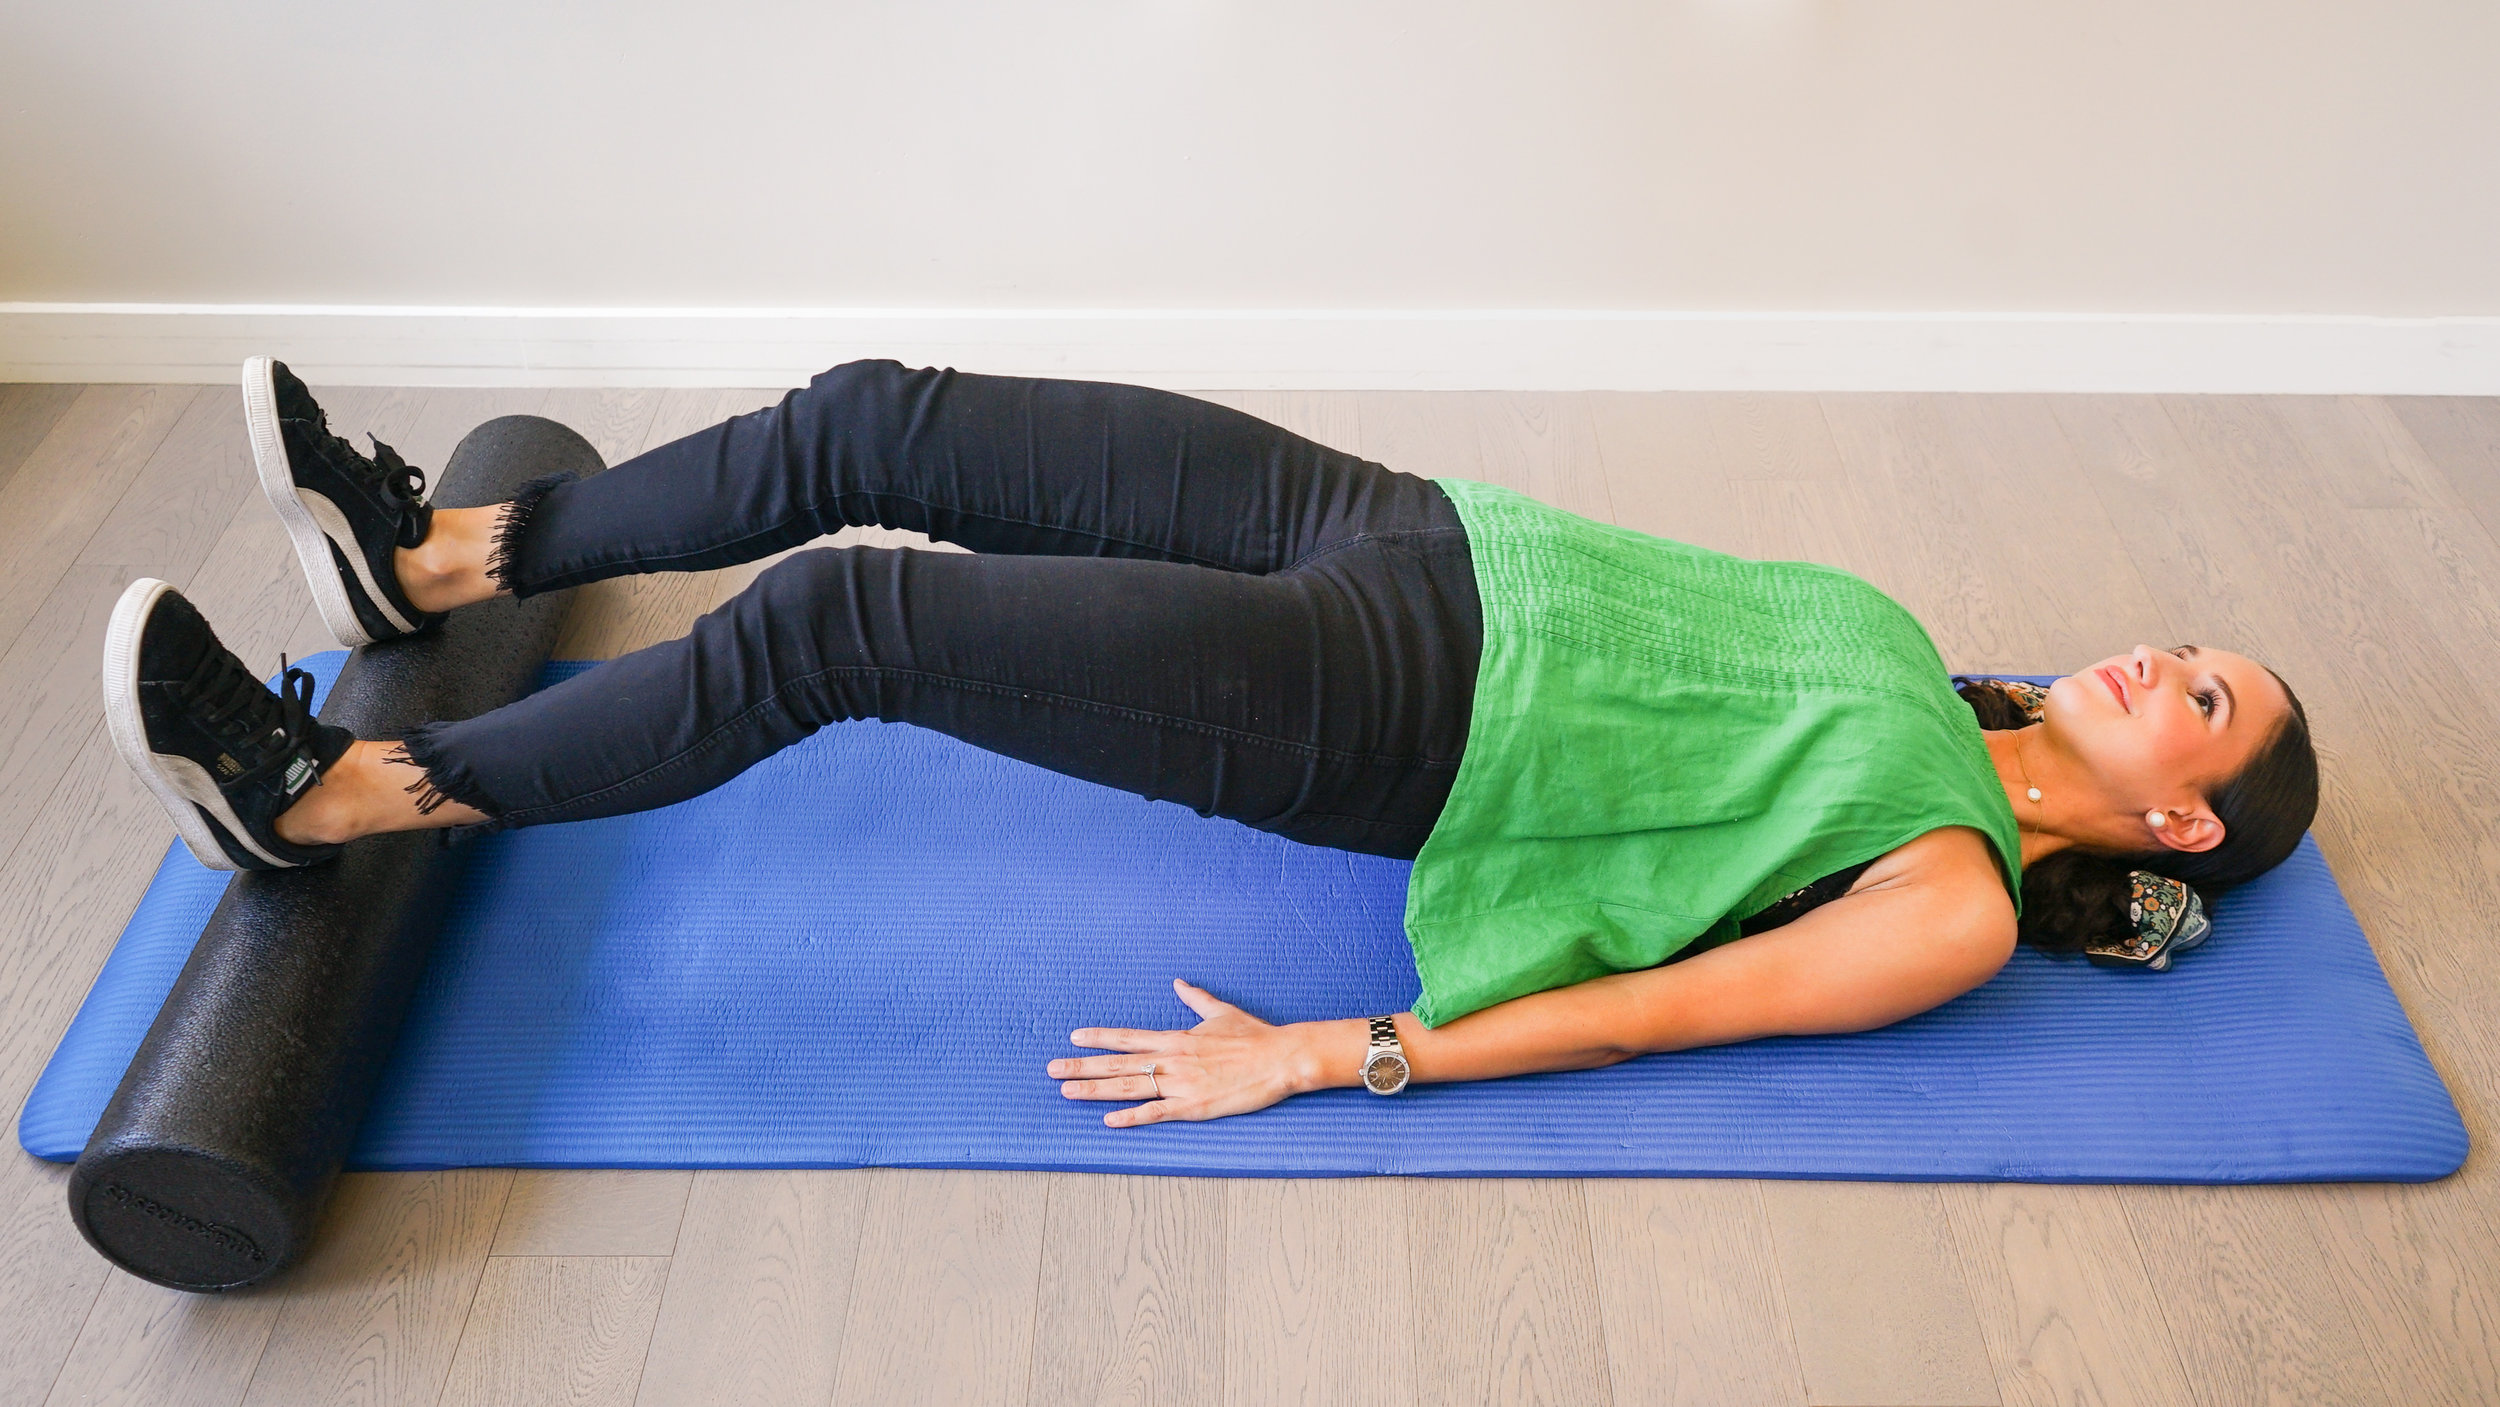
As you are rolling in, you want your pelvis to elevate with the foam roller. This way, you maximize your glute and hamstring engagement.
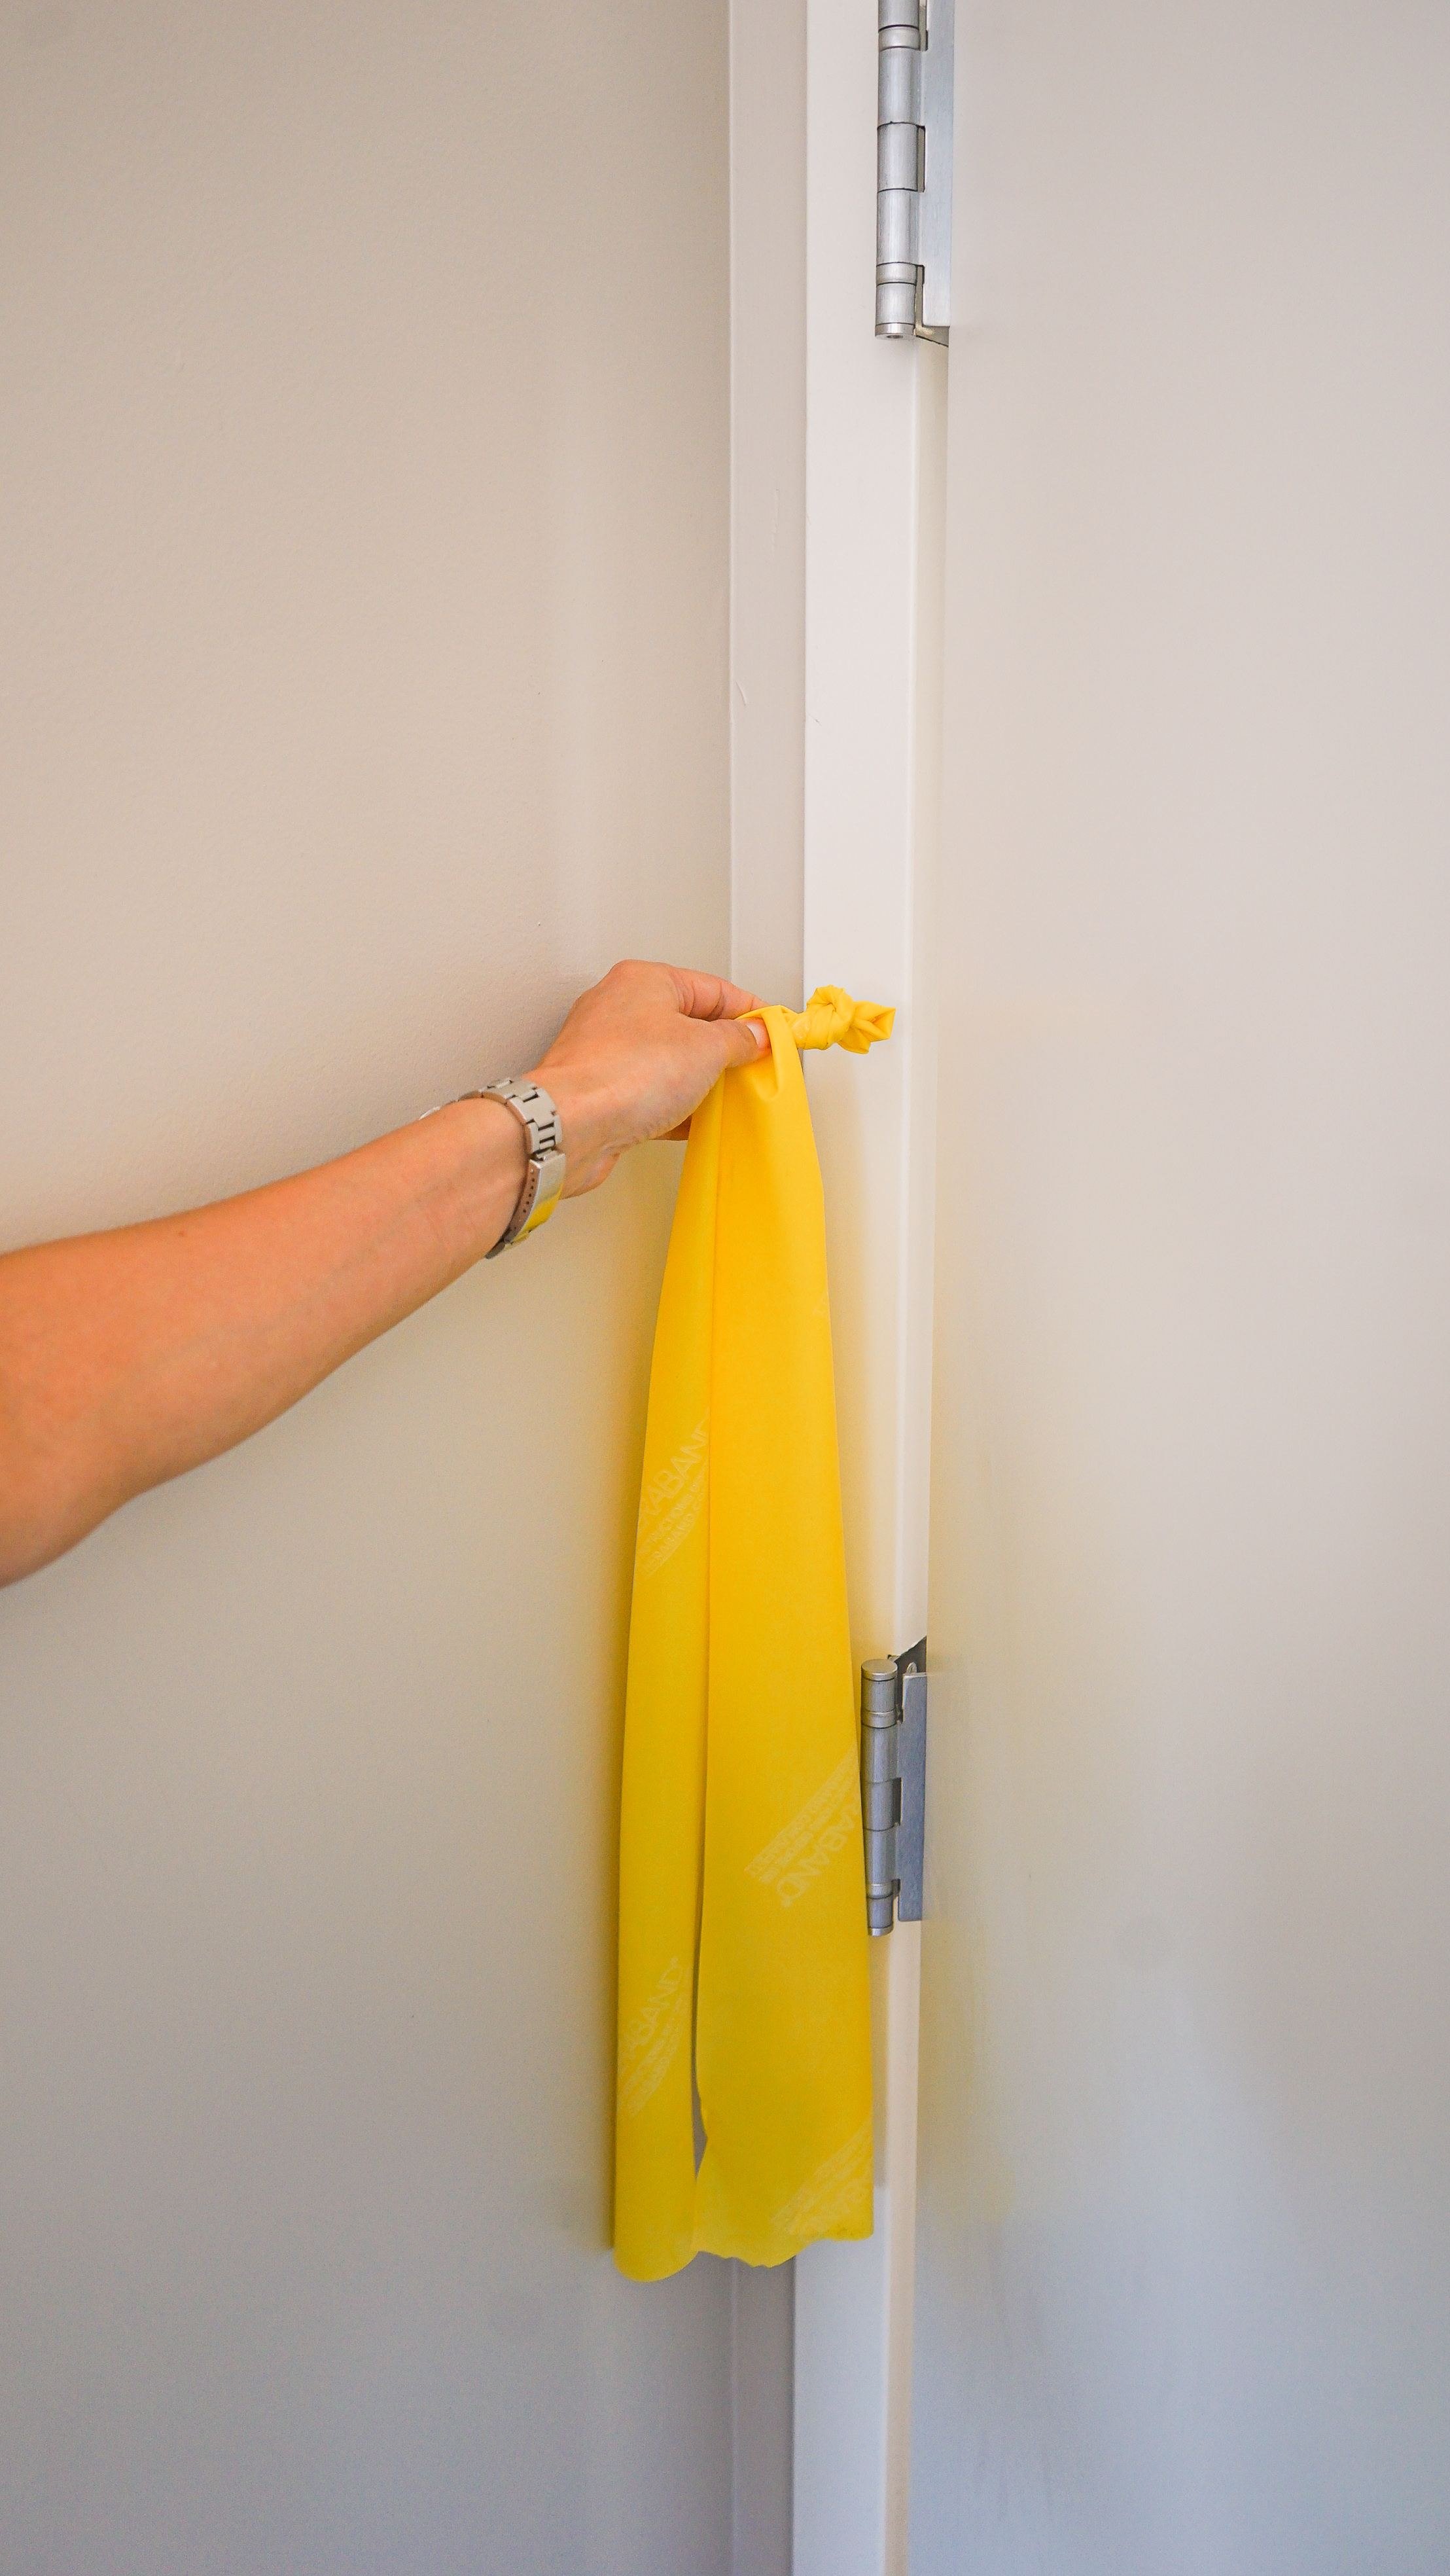
Resistance bands rows
Rowing helps promote upper core strength and postural endurance of the mid-back. Mid-back strength helps address mid-back and neck pain, which can occur from poor posture or looking down at your phone.

(Photo: Kimberly Wang)
Start by taking your resistance band and creating a slip knot in the middle. The two sides of the band should be about even.
(Photo: Kimberly Wang)
Then, find a door that has open space to exercise around it. Crack the door open, and carefully slide the knot between the door and frame. When you shut the door, the band should be secured in place. This goes without saying, but please be careful of your fingers when doing this.

(Photo: Kimberly Wang)
Holding the ends of resistance bands before you, step three feet away from the door, keeping your knees slightly bent and feet hip-width apart. Make sure your pelvis is in neutral position.
Start by squeezing your scapulas (shoulder blades) down towards your pants pockets and together. Then slowly pull your elbows back by squeezing your shoulder blades even more. Stop your elbows when they reach under your shoulder.
Do three sets of 10 to 15 reps with a two second hold at the back
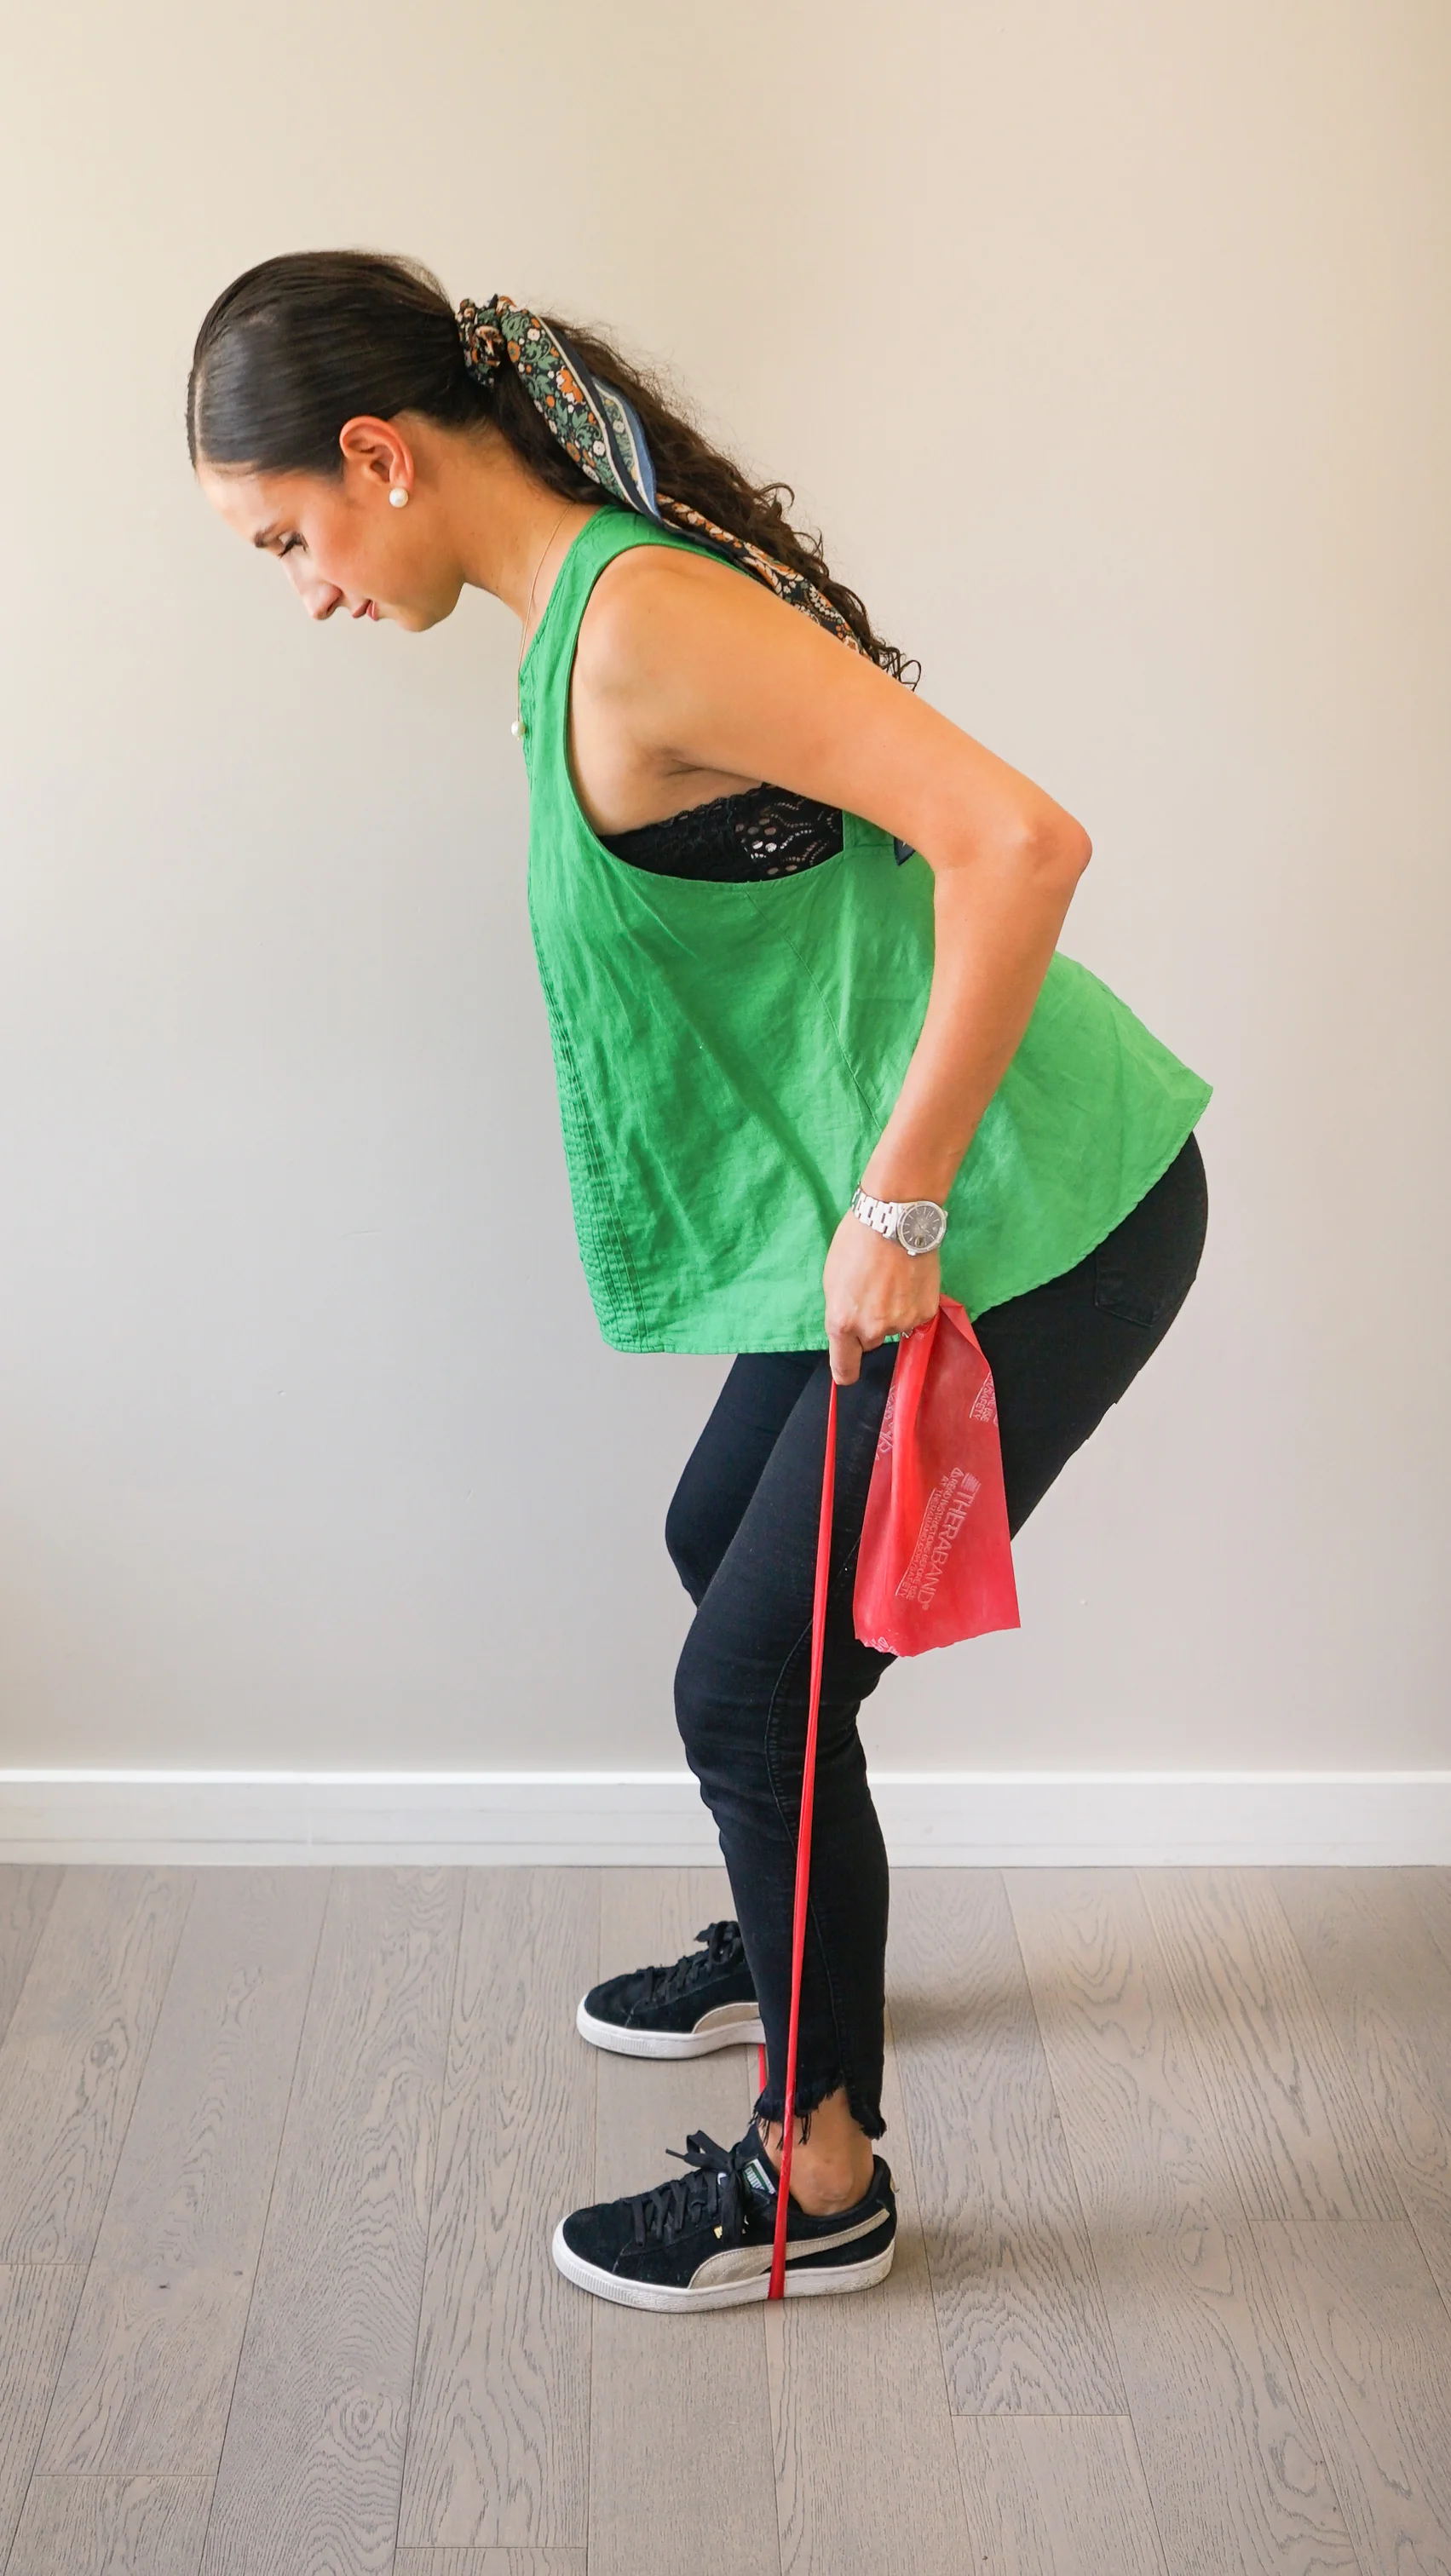
Advanced bent over rows
This move helps strengthen all the muscles from your neck to your butt. Be careful not to arch your back when you do this. If you feel any pain, it usually means you are overarching your back or bending the spine if you. Dr. Rodriguez also suggested using a mirror to guide you as you find the right position for this move.
(Photo: Kimberly Wang)
Start by separating your feet hip-width apart, keeping a slight bend in the knees. Hinge forward from the hips while maintaining a neutral spine. Keep your abs engaged by pulling them tight towards your spine.
Step both feet onto the band. Arms are reaching forward for band, squeeze shoulder blades towards your pants pockets. Further squeeze your shoulder blades together as your pull elbows up towards ceiling. Maintain control as you release the hold and return your arms into starting position.

(Photo: Kimberly Wang)
You can make this move harder by tilting your body further forward. The more your trunk is parallel to the ground, the more you increase back strength since you’re working against gravity.
Stay in touch! Follow me on Instagram and Facebook to be the first to know when I post.
(Featured photo: Romina Farías/Unsplash)
While The Off Hours may at times use affiliate links, we always offer genuine editorial recommendations. As an Amazon Associate we earn from qualifying purchases at no additional cost to you.